Quick Start Guide
Introduction
This page is a guide to getting you started with your ePortfolio. Here you will learn how to create the basic requirements for assignment #6 in English 150/250. We also have a video version of this guide. By following the instructions below, you will: 1) Add the necessary pages; 2) Create the primary navigation menu ; and 3) Establish a static front page and posts page for reflections. Good luck with your new ePortfolio!
Dashboard View
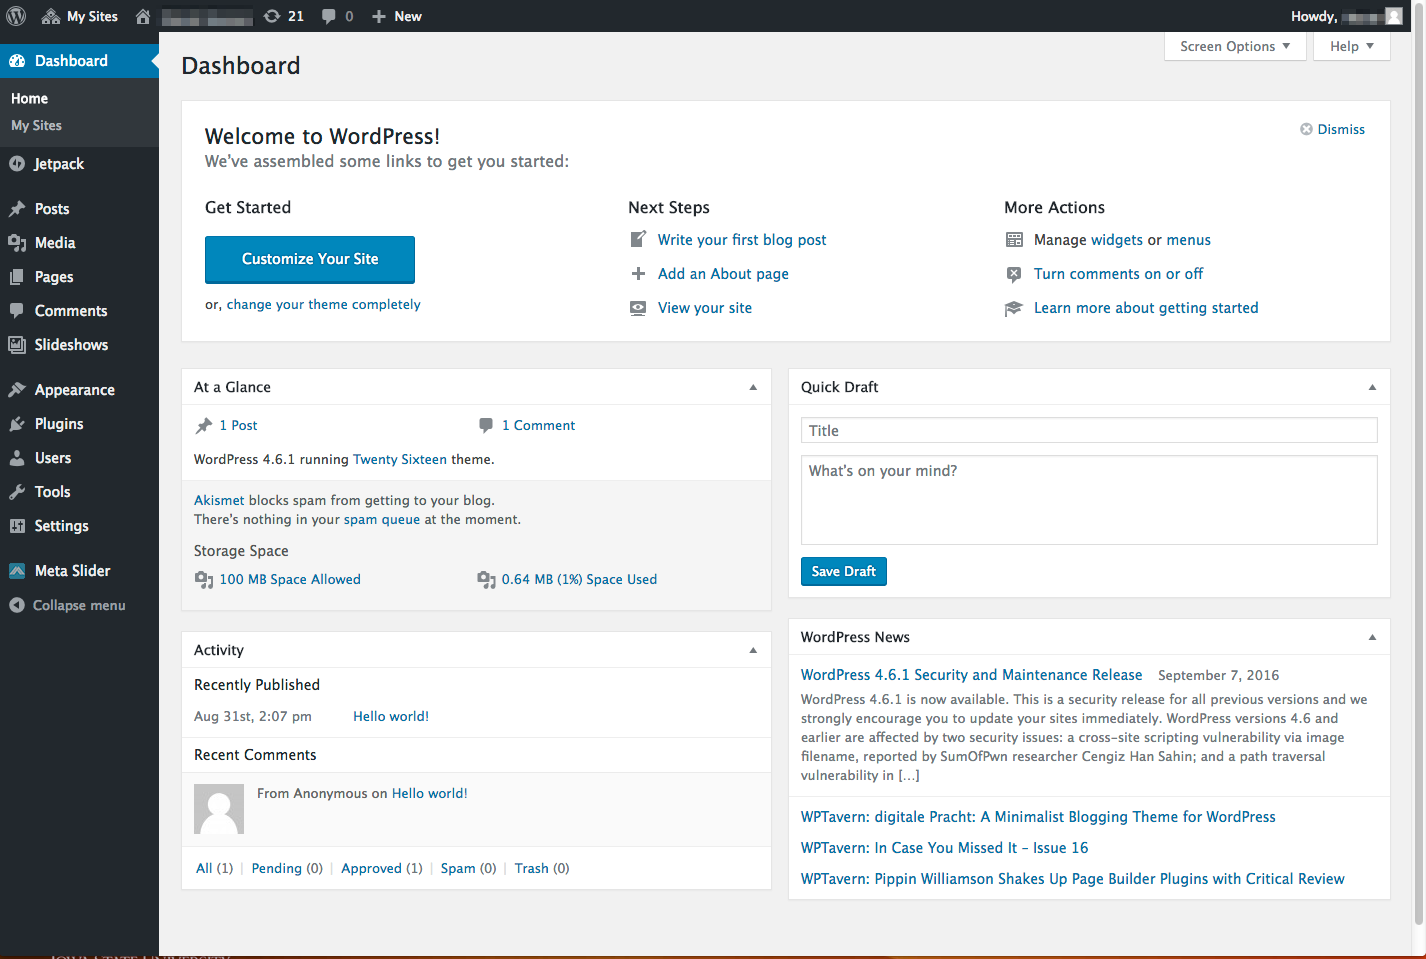
The dashboard is the back end of your ePortfolio. In web development and design, all of your content creation and administrative work will be done here. The sidebar on the left is where you will spend most of your time, and the top bar offers some quick, commonly used options, such as the “+” icon for creating new pages and posts. Hover over all of the items in the left sidebar and top bar to see the options available to you. Always hover first, because if you click on an item you will navigate to it right away.
Add New Page
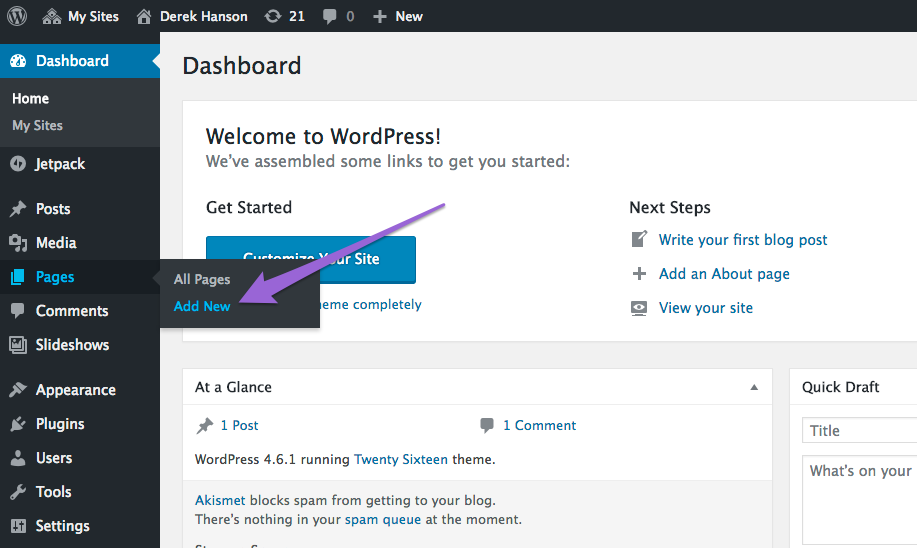
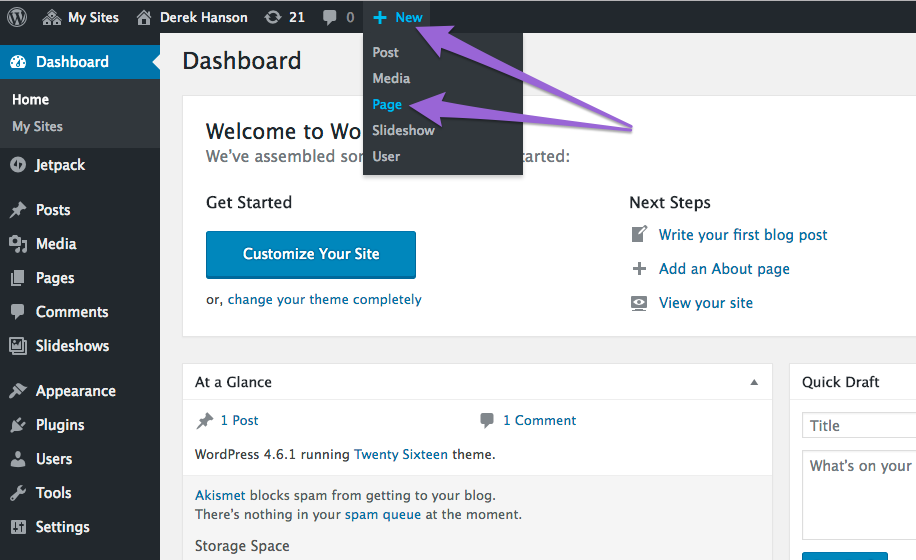
The single most important task for creating your 150/250 ePortfolio is creating pages. You can add pages by selecting the Add New Page option on the left or the +New Page on the top.
Title and Content
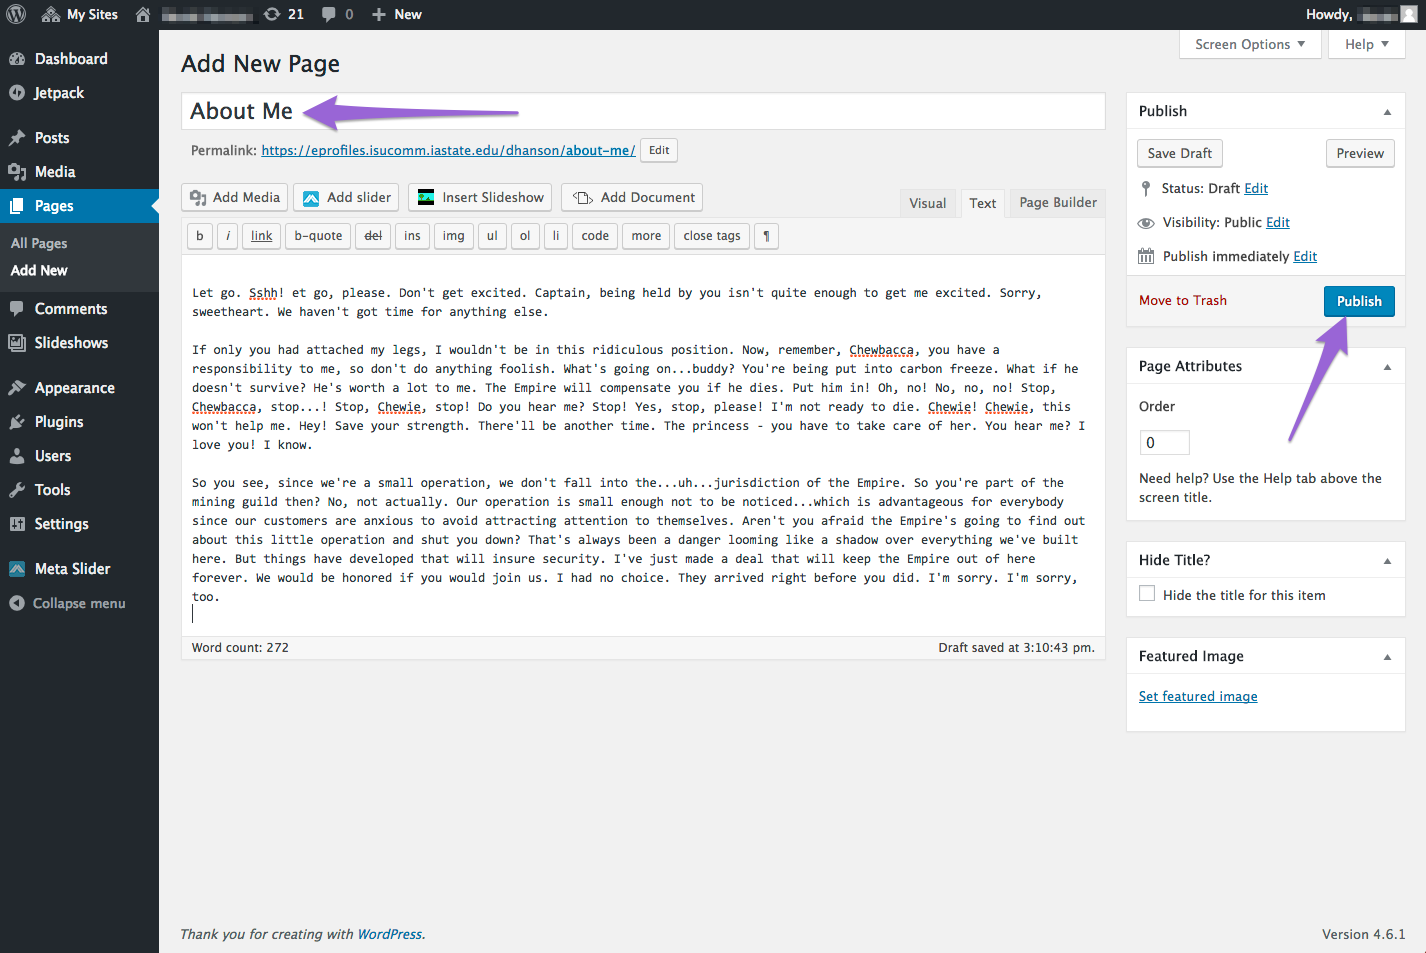
Give your page a title and then type your desired content in the text editor. Click the Publish button to save your work and make it go live on your ePortfolio. For 150/250 students, you will need six pages to start: About Me, Written, Oral, Visual, Electronic, and Reflection Blog.
Make all six pages by following the steps of adding a new page. For now, just put the title and publish. You will not need any content in the text editor now.
View all pages
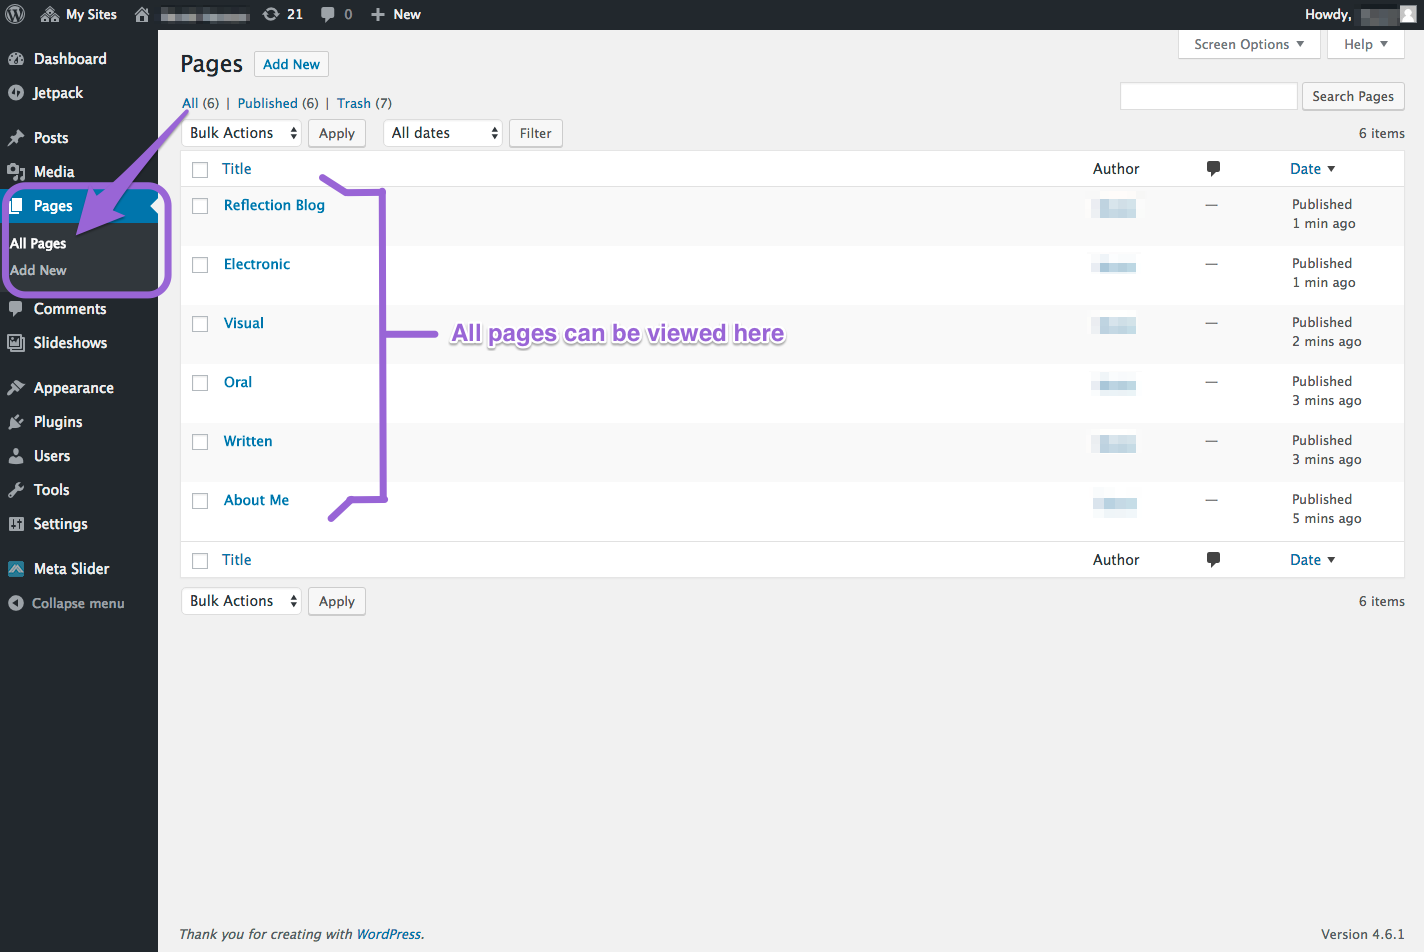
After repeating the add new page process, you should have six total pages in your ePortfolio. You can view them by hovering over Pages and clicking on All Pages. This view in your dashboard is an easy way for you to make quick edits, view pages, or move items to the trash.
Note: You will see a seventh page at first because WordPress generates a Sample Page for you. You can either edit or delete this page.
Create Menu
Creating your menu is the next most important task in your ePortfolio. Your Written, Oral, Visual, and Electronic (WOVE) communication examples that you will include in your ePortfolio need to be organized for easy navigation. Much like a table of contents, your menu is how you will organize all of your content into the ePortfolio so that it is easy for users (your instructor mainly) to find all of your communication artifacts required for Assignment #6 in 150/250.
To create your menu there are multiple steps:
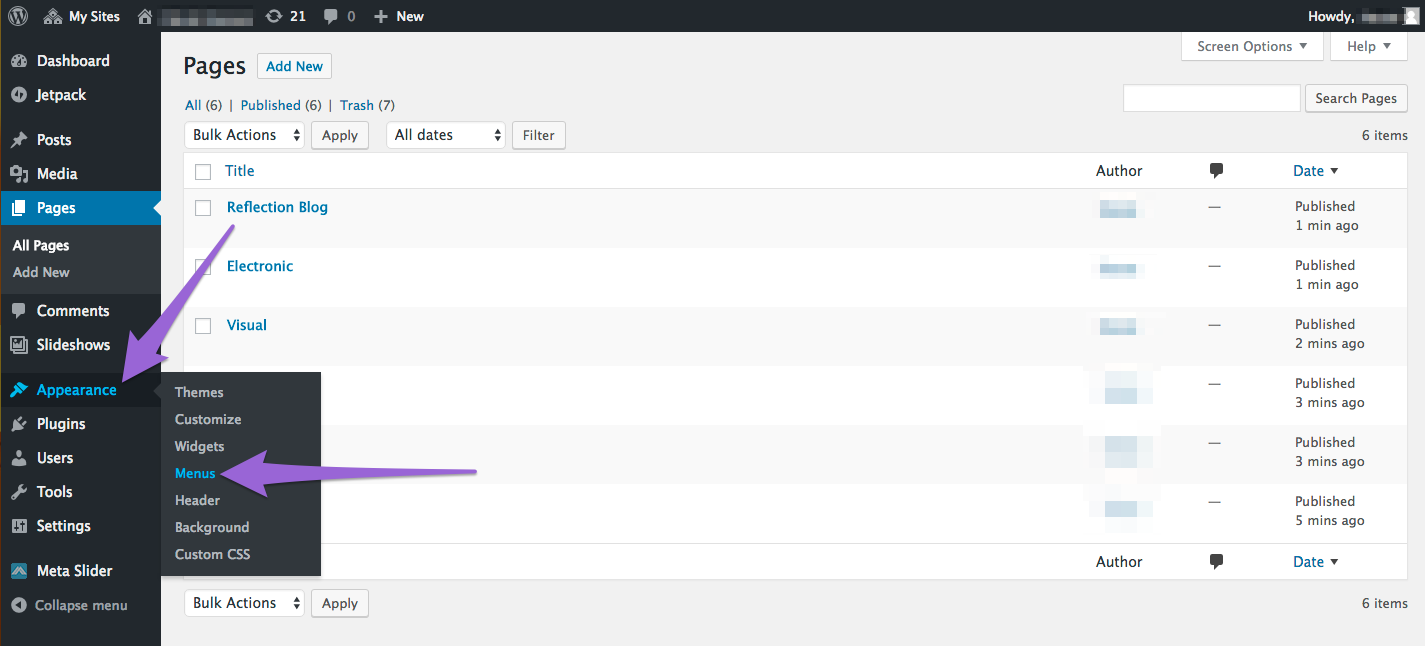
- Hover over Appearance in the sidebar and find Menus.
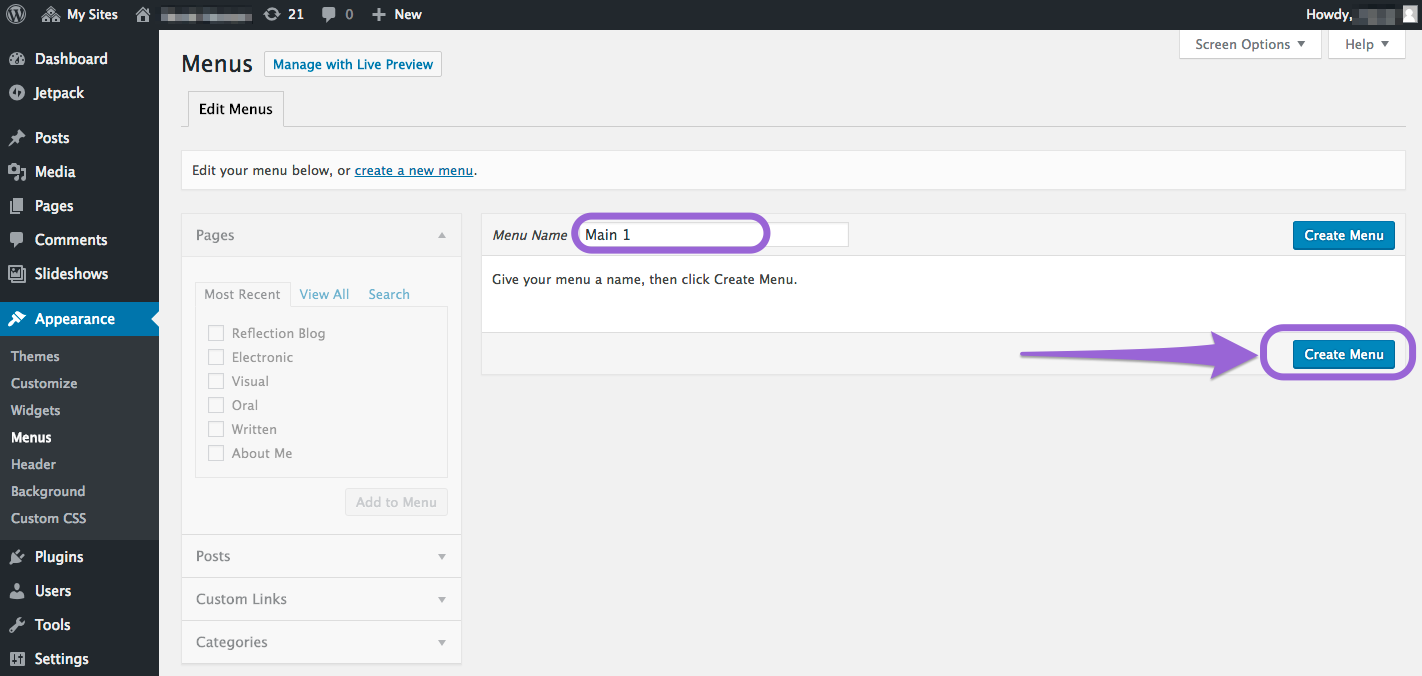
- Title your menu something simple for you to remember, i.e. Main, Top Nav, or Primary. Click the Create Menu button.
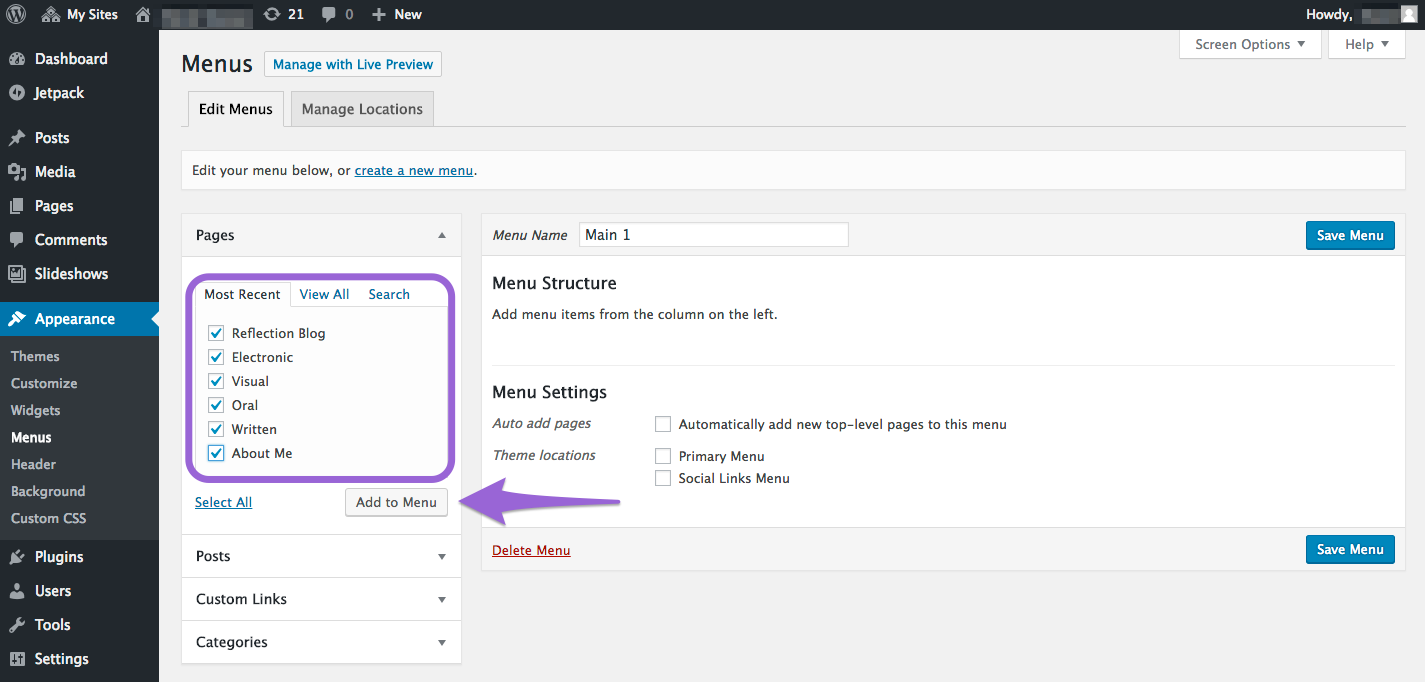
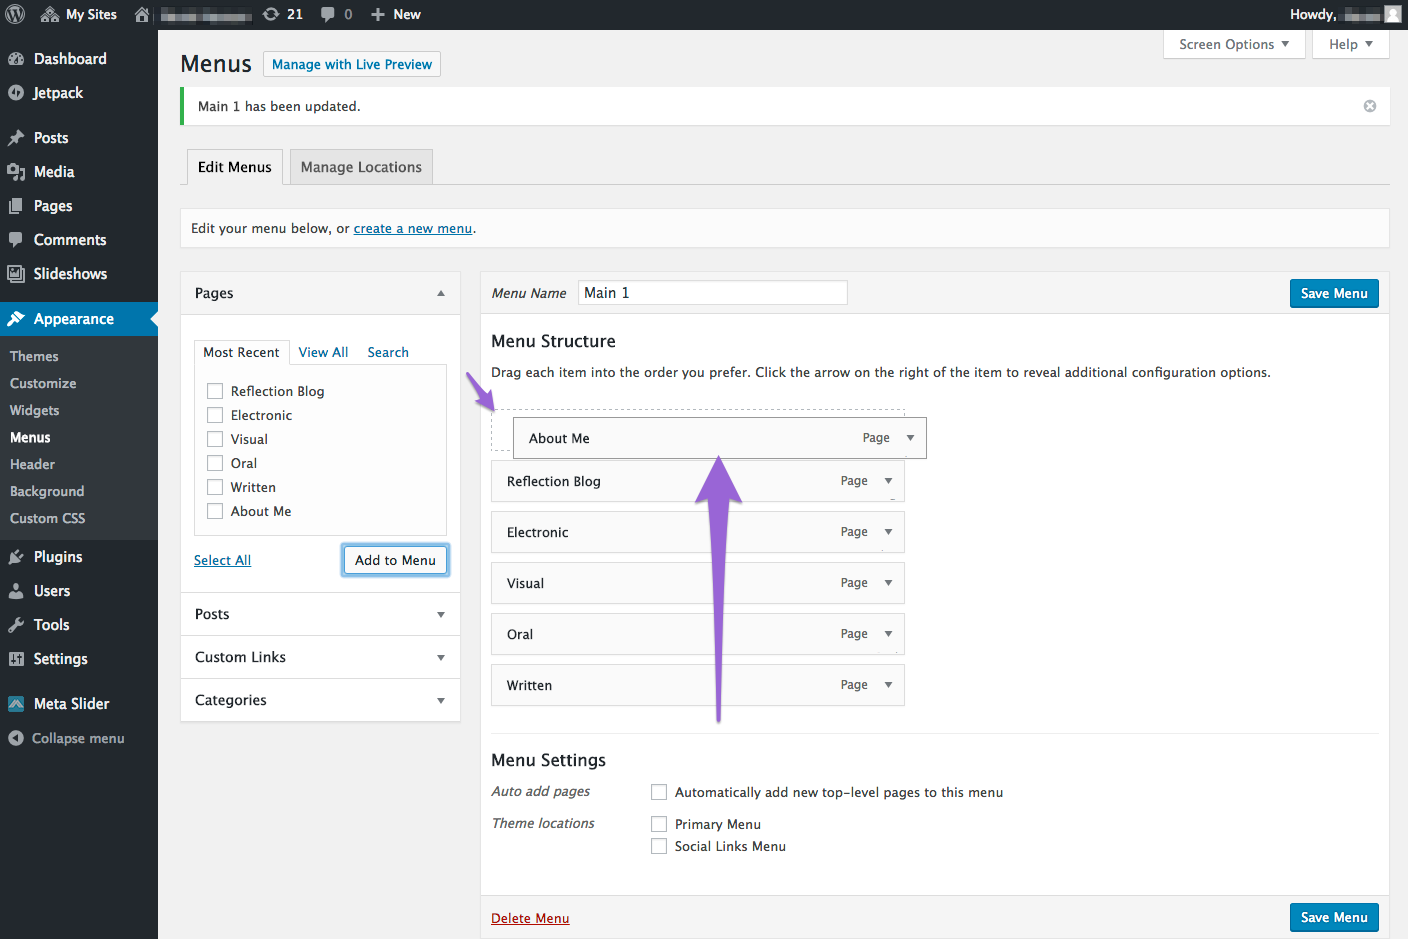
- Select all of your pages on the left side and then click Add to Menu.
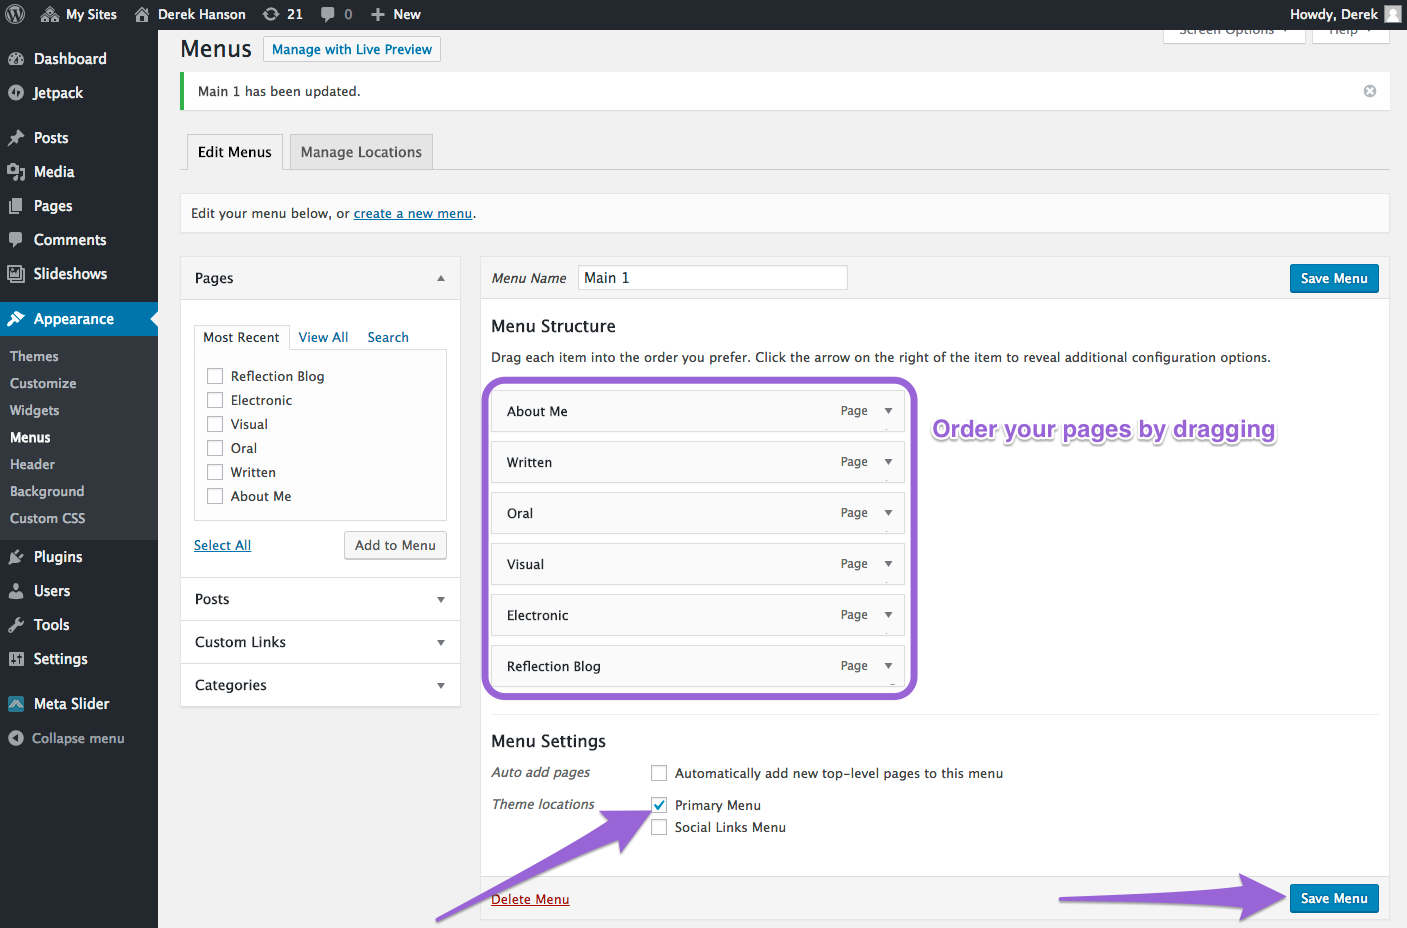
- The pages will appear in rectangular bars in your menu space now. Click and hold an item in your menu to drag it into the order you want. For 150/250, the order should be: About Me, Written, Oral, Visual, Electronic, and Reflection Blog. As you add more pages, be sure to add them to the menu. To make a page a sub-item, drag the page underneath the page you want to be the parent and move the bar to the right a little bit until it locks into a dotted box that will make it a sub-item.
- Check the Theme Locations box to set your menu as Primary Menu. Then you can click the Save Menu button.
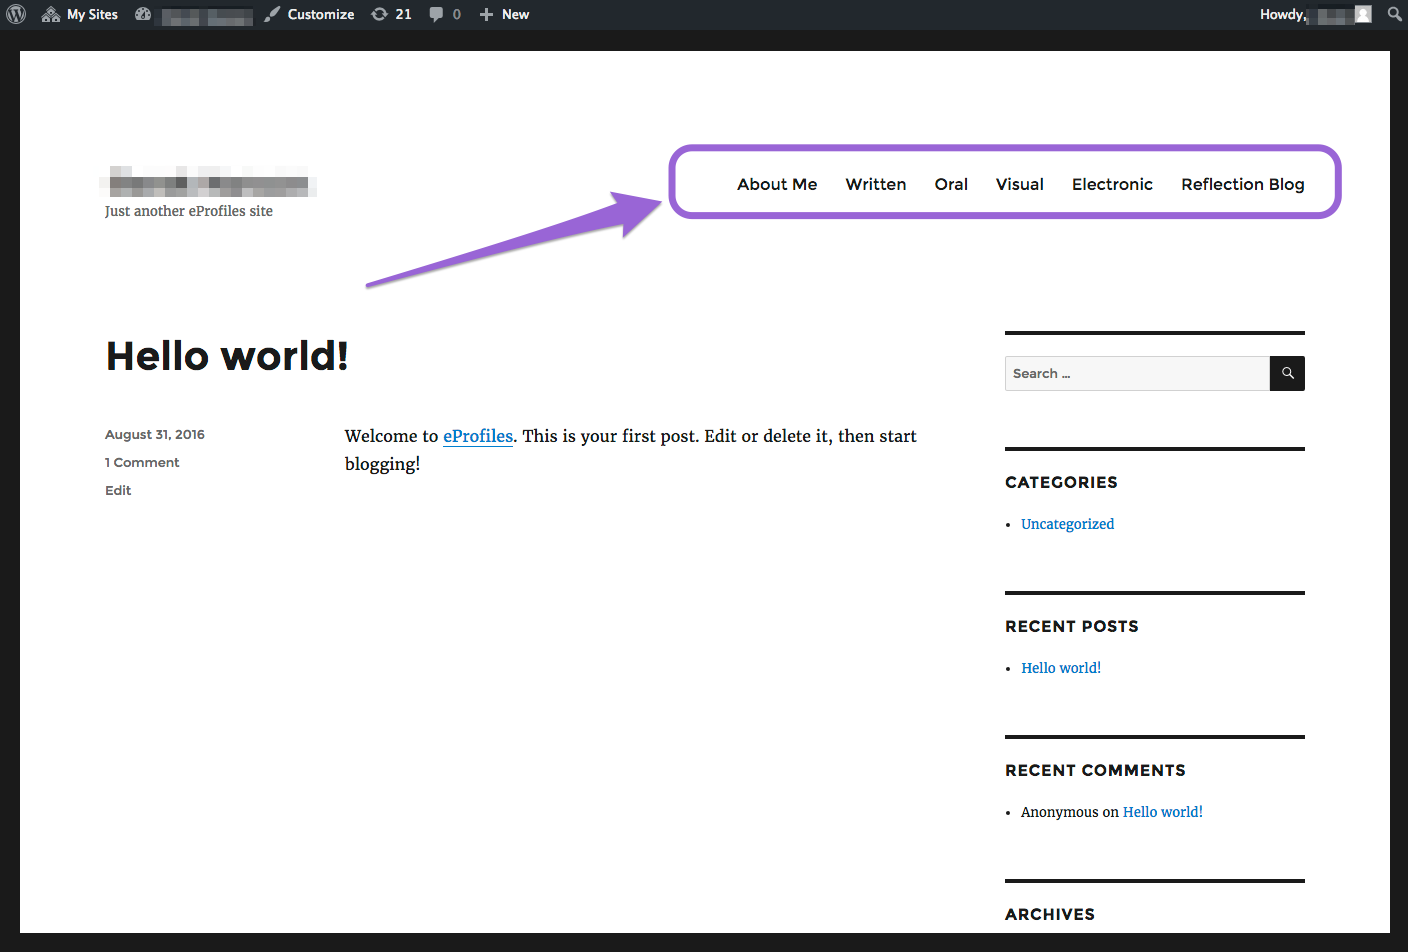
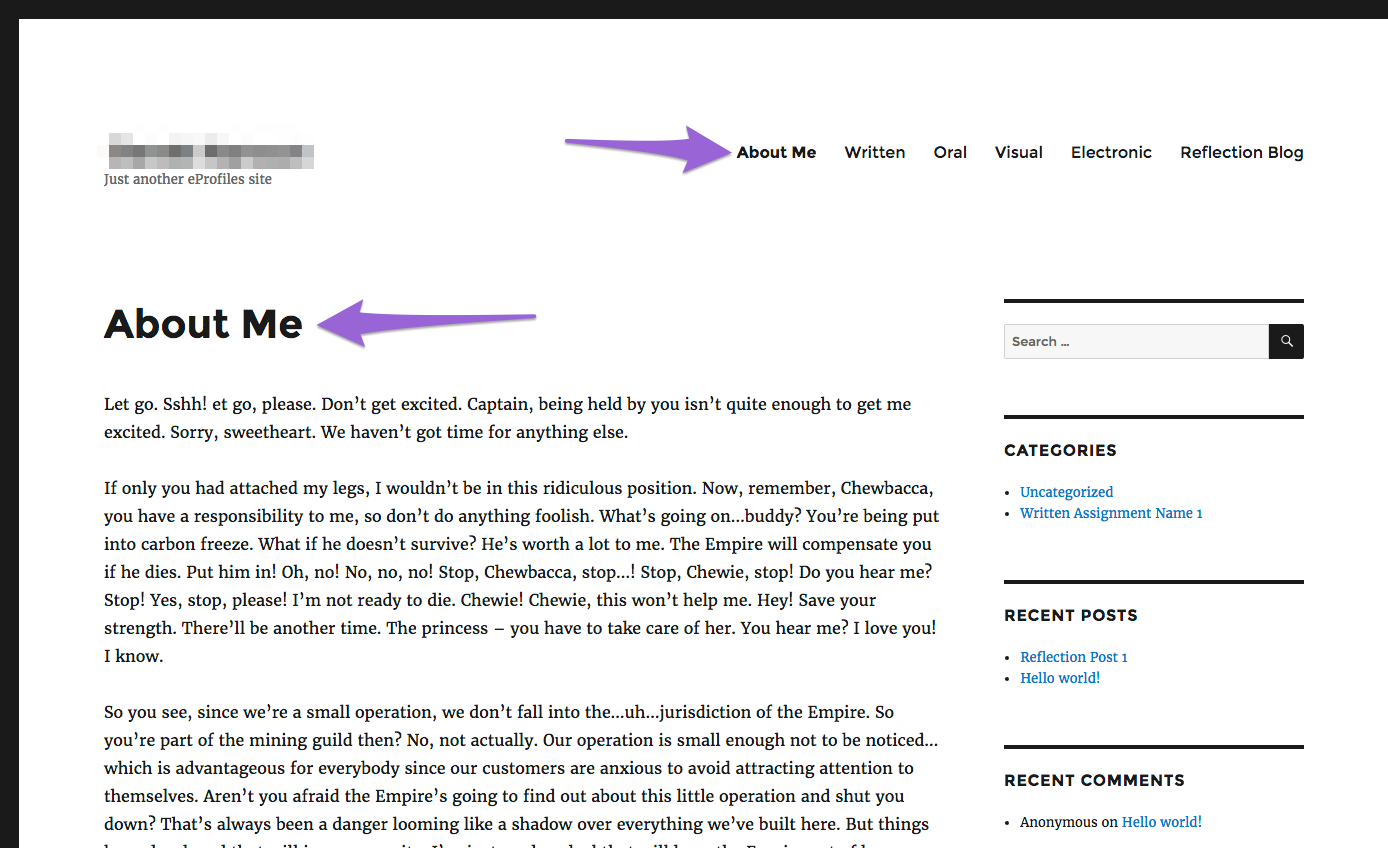
- Visit your site and you will now find your menu on the top of your ePortfolio main page.
Add New Post
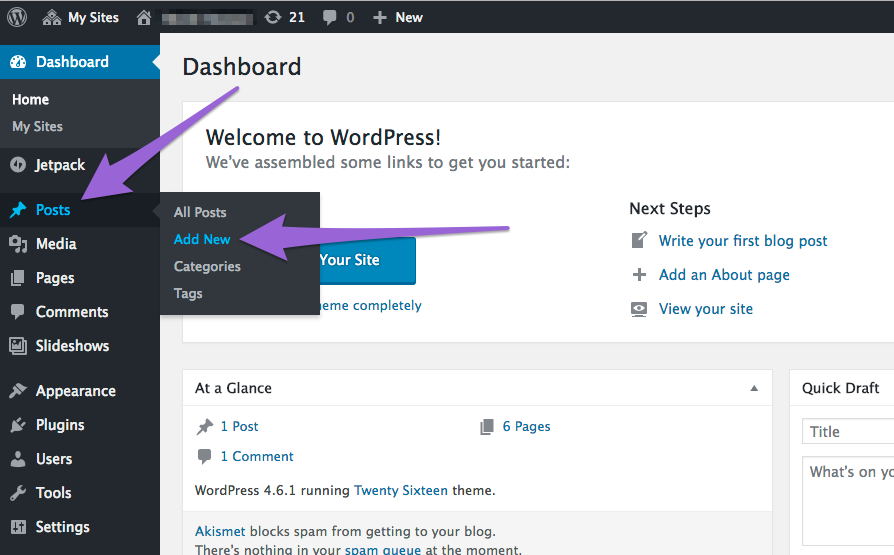
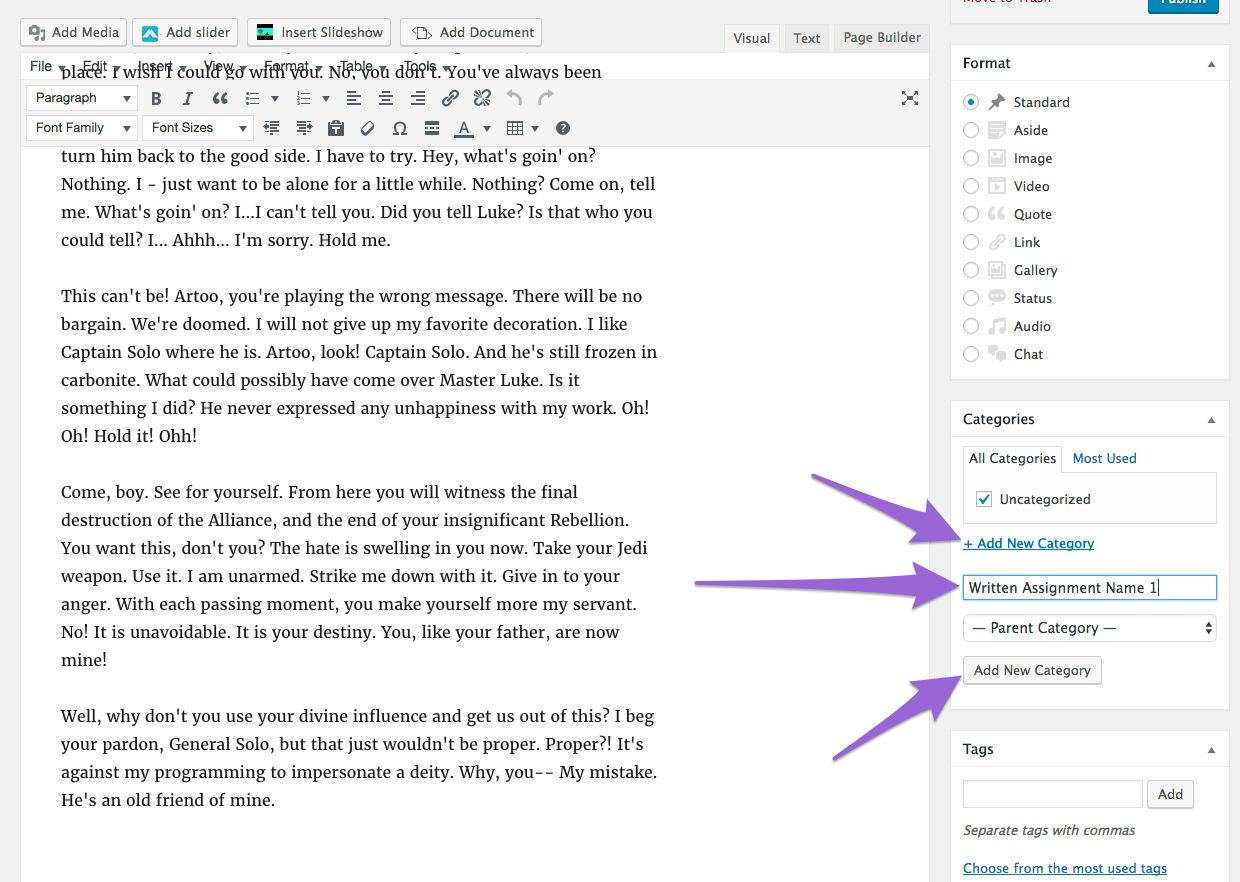
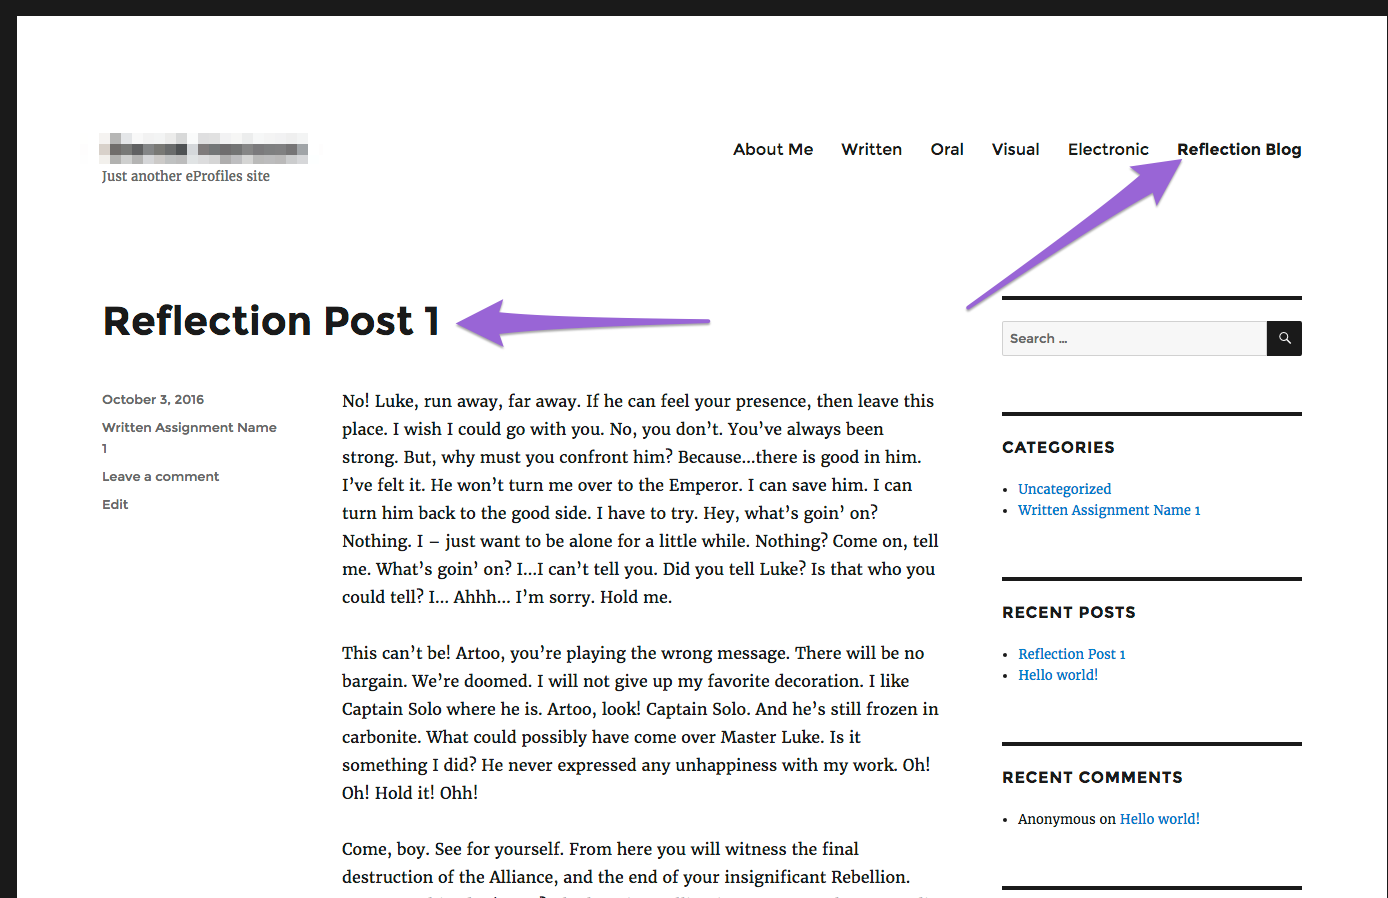
For each assignment in 150/250, you are required to write a reflection about your writing process. Some instructors will have you submit your reflections as Blog Posts. These are different than Pages (static content) as Posts are always changing or dynamic. The process for creating a Post is similar to Pages. Hover over Posts and select Add New. Title your post and write your reflection in the text editor.
The right side of the text editor box gives you multiple options for your posts. Rather than using a menu, Posts are organized with Categories and Tags. How you decide to use these features depends on your own purpose and personal preference. You might have Categories for each WOVE communication and then use Tags for the assignments or topics you are writing about. Posts can be very useful to keep a running blog for your class but requires some experimenting with the WordPress options. See this Categories and Tags article for more help.
Set Static Front Page and Posts Page
Once you have established your Pages, Menu, and Posts, you can set your ePortfolio to have a Static Page for your homepage and a Posts Page for your Reflection Blog. To do this, hover over Settings and select Reading. Choose what page you would like to be your homepage and select your Reflection Blog to be your Posts Page. This will allow you to keep all of your posts organized into one page that is separate from your other WOVE components. Every time you create a post it will automatically be added to the Reflection Blog page for you.
Conclusion
Your ePortfolio is now set up! Continue to develop your site to reflect your personal interests and visual style. To learn more about your ePortfolio and WordPress, you can return to the ePortfolio Support Site. You may also want to check out the video WordPress 5 Essential Training at LinkedIn Learning.
For Support
If you encounter difficulty during any part of these tasks, please e-mail us at olt@iastate.edu for assistance, or stop by 306 Ross during our scheduled support hours.
If you cannot see the images in this documentation, click here.
