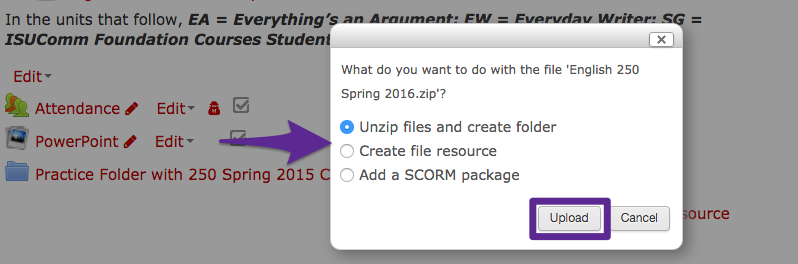
Welcome! In this tutorial you learn about uploading folders to your Moodle course site. If you are interested in reading about moving files between sub-folders within a folder, please read this article. Uploading a zipped folder is perhaps the easiest way to get a folder of documents on your Moodle course site. Simply drag and drop the zipped folder to the desired location in your course. Once you drop the folder in the desired location a pop-up will appear giving you three options. We recommend sticking with one of the first two options: 1)”Unzip files and create a folder”, or 2) “Create file resource”. Option 1 will give your students access to a folder they can click on and then download individual documents from within that folder. Option 2 will give your students a zipped folder that they can download to their computer with a single click and then unzip the folder and have everything all at once. Once you select your preferred option and click “Upload”, your folder or file resource will be on your course site. If you encounter difficulty during any part of these tasks, please e-mail us at olt@iastate.edu for assistance, or stop by 306 Ross during our scheduled support hours. If you cannot see the images in this documentation, click here.Uploading a zipped folder
For Support