Welcome! In this tutorial you will learn how to use the clickable grading rubric that is included in the English 150/250 template. The rubric is a shortened version of the standard rubric provided by ISUComm Foundation courses. All of the scores are included and automatically calculates grades and enters them into the gradebook, saving you an enormous amount of time. This rubric has been approved by the ISUComm directors as the standard for grading assignments and does not need to be altered in any way.
Step 1:
Click on the assignment dropbox that you want to grade.

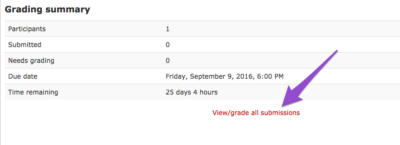
Step 2:
Select the “View/grade all submissions” link below the grading summary.
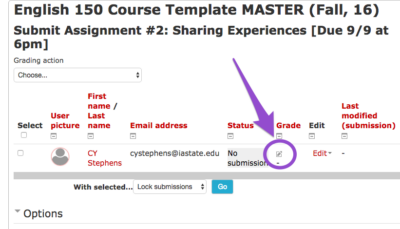
Step 3:
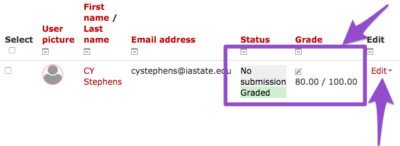
Click the small icon under the “Grade” column for the student’s paper you wish to grade.
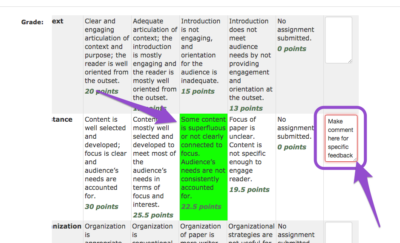
Step 4:
The rubric is located at the bottom of the “Submission Status” screen. The rubric already includes scores for each section of the assignment’s rubric, calculated using weighted means. Click the cell you feel is appropriate for each type of assessment. The rubric will remain highlighted and calculate the score automatically. If you choose, you can write comments in the far right column for each category. It may not be visible on the screen, so you will have to scroll to the right to find the comment column.
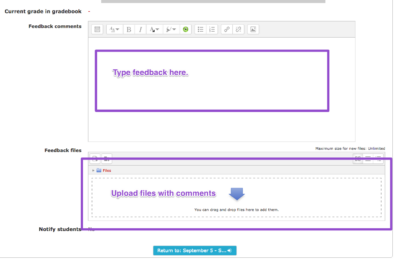
Step 5:
Once you have completed the rubric, scroll down the screen. Here you can provide summative feedback comments in the text editor. If you graded a Word or PDF file with inline comments, upload the document you have written comments on now. Click the “Save Changes” button in the red box. You will then be taken to a confirmation screen. Click the “Continue” button to return to the assignment submission page.
Step 6:
Once you have completed the student’s grade, you can move to the next student’s assignment and repeat Steps 1–5. However, you have some options for the grade you just submitted.
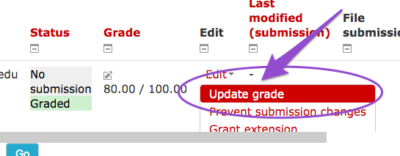
The rubric calculates the weighted mean for you automatically, but there is not much flexibility in making minor adjustments to the score. If you chose the appropriate cells for each section of the rubric but are unhappy with the score that was calculated, click the “Edit” link next to the “Grade” column for the student and select “Update grade” from the dropdown menu.
Step 7:
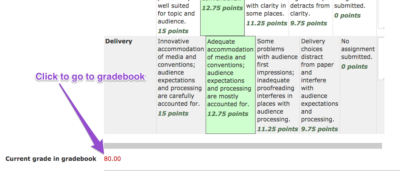
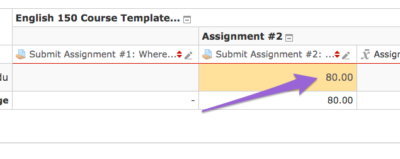
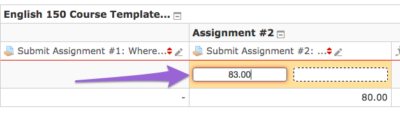
You will be taken back to the completed rubric, but there will be a new link found at the bottom of the rubric: “Current grade in gradebook.” Here you will see the current score. Click the score (80.00 shown in this example screenshot) to go to the gradebook. From there you edit the score in the gradebook (click here for more information on setting up gradebook) to your liking. Select the score you wish to change, and then enter the new score (original score shown here is 80.00 being replaced with 83.00).
For Support
If you encounter difficulty during any part of these tasks, please e-mail us at olt@iastate.edu for assistance, or stop by 306 Ross during our scheduled support hours.
If you cannot see the images in this documentation, click here.