Welcome! In this tutorial, you will learn how to log in to your course site as a particular student. If you want to see how your course site appears to students in general, then you probably just want to switch roles. Documentation for switching roles can be found here. It is rare that you would need to log in as a particular student, but possible if you want to see, for example, what a particular student sees when checking his or her grade. Something this particular goes beyond the general view that switching roles offers. However, caution needs to be exercised when logged in as a student as Moodle will track what you do and attribute your actions to the student. If it happens that it is necessary to log in as a particular student, follow these steps:
Step 1:
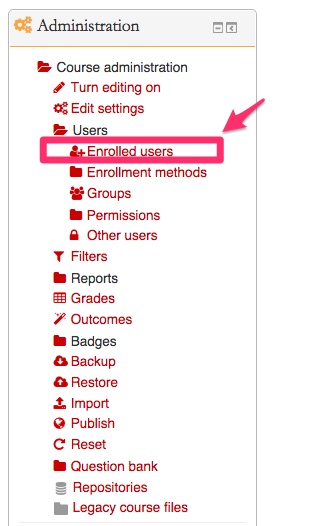
In the administration block, click on “Enrolled users” under the Users menu.
Step 2:
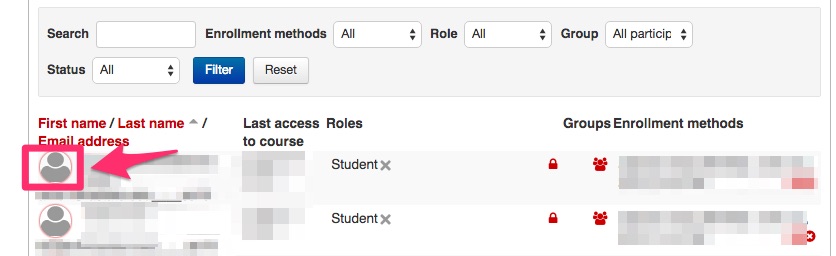
In the student list, click on a certain student’s picture that you want to log in as.
Step 3:
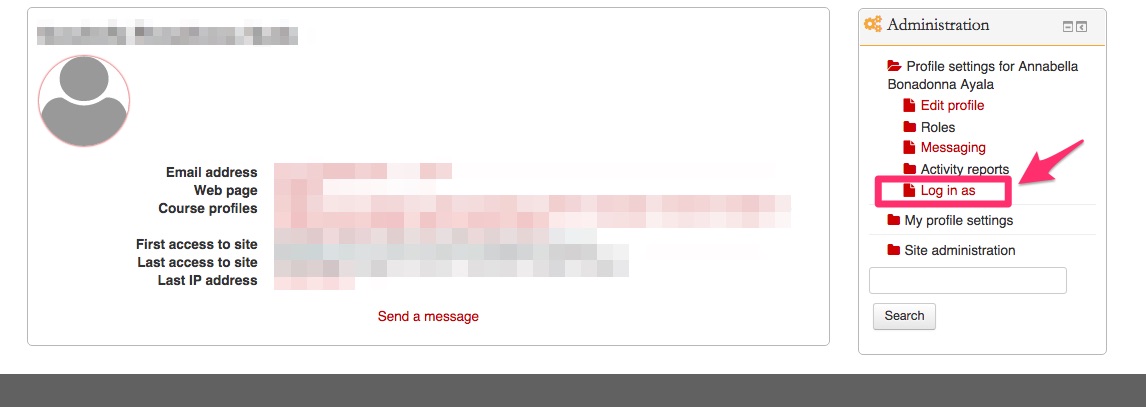
In the student’s profile page, click on “Log in as” in the administration block.
Step 4
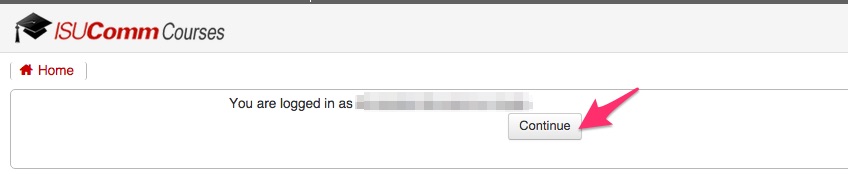
You will find a statement saying “You are logged in as [student’s name].” Click on “Continue” to proceed. You will now view the course site as the specific student.
Step 5
When you finish you must completely log out of Moodle and log in again with your own credentials.

For Support
If you encounter difficulty during any part of these tasks, please e-mail us at olt@iastate.edu for assistance, or stop by 306 Ross during our scheduled support hours.
If you cannot see the images in this documentation, click here.