Welcome! In this tutorial, you will learn how to hide or show content (e.g., labels, activities, blocks, etc.) on your course site.
In some cases, you will want to hide content on your course site from students. Some reasons for hiding content include the following:
- You want to create an activity or another resource on your course site but do not have time to finish creating it in one sitting. Hiding such content allows you to build a resource over time and show it when it is ready.
- You have determined that the content is not necessary for students. Either you have not yet arrived at a point in the course where students need to worry about a particular section of the course, or you have completed a section of the course and students no longer need to worry about it. Hiding this kind of content allows you to keep it if you need to refer to it or plan on using it later in the course without making students scroll through non-urgent content.
- Some templates, like the English 150 and 250 templates, come with certain items already hidden from view. This reminds you to edit this content before showing it to your students and helps avoid the potential confusion and embarrassment of using a default scheduler activity, for instance. (You want to have the right dates entered before you show a scheduler.)
This tutorial shows you how to hide a piece of content, and then how to show the same piece of content later. The tutorial will focus on the first writing assignment found in the English 150 template.
Step 1:
Click “Turn editing on” at the top of the course site.
Step 2:
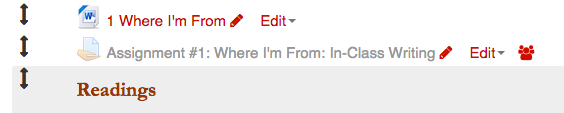
Next, scroll down to the piece of content you want to hide. Click on the “Edit” button, then select “Hide” next to the eye icon in the drop-down menu.

The item will now be hidden. Notice that a hidden resource will have the text grayed out.
Keep a sharp eye out for gray text, especially when working with a template for the first time; you may think an item is visible when it is actually hidden! To make sure that a resource is visible to students, you may want to log in as a student to double check. Read this article to learn how to log in as a student.
Show Content
Once you have finished creating and editing a particular piece of content, you will need to make sure it is visible to students.
Step 3:
While in editing mode (see step 1), click on the “Edit” button next to the resource you want to show. Then, select “Show” next to the eye icon in the drop-down menu.
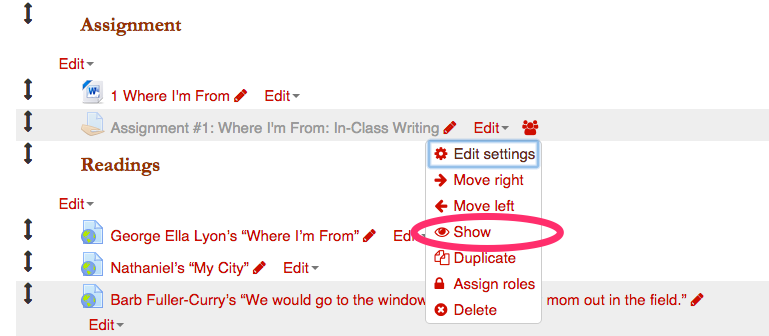
The text should now be red, meaning it is visible. If you want to double check but do not want to log in as a student, follow this step again; if the menu says “Hide” next to the eye icon, that means it is currently visible.
For Support
If you encounter difficulty during any part of these tasks, please e-mail us at olt@iastate.edu for assistance, or stop by 306 Ross during our scheduled support hours. If you cannot see the images in this documentation, click here.