Featured images appear in different places depending on your theme. In the Twenty Nineteen theme for example, the featured image appears at the top of the page with a blue overlay. You can add a different featured image to each page and/or post of your ePortfolio.
Step 1:
Open the page (or post) you want to add the featured image to.
Step 2:
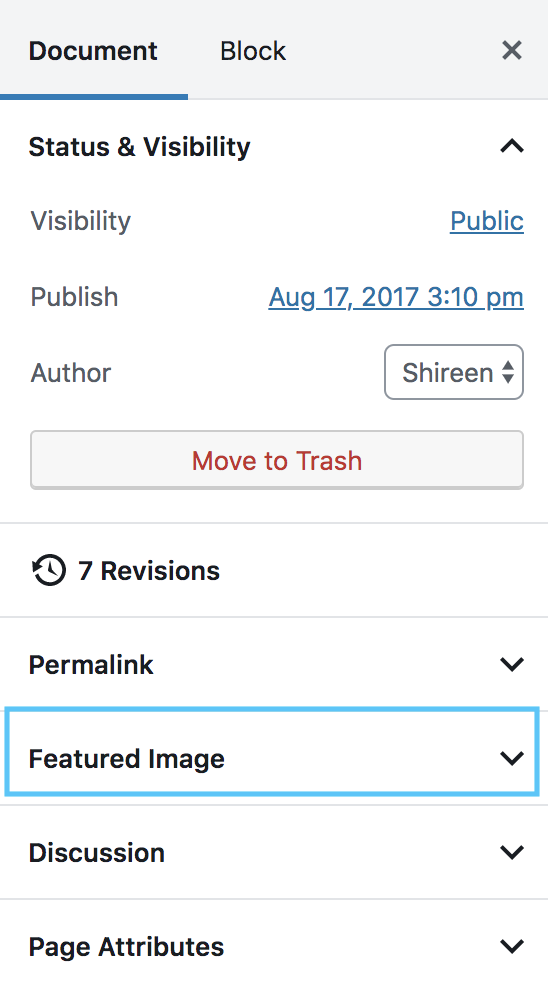
Locate the document properties panel in the right-hand sidebar. Click on Featured Image.
Step 3:
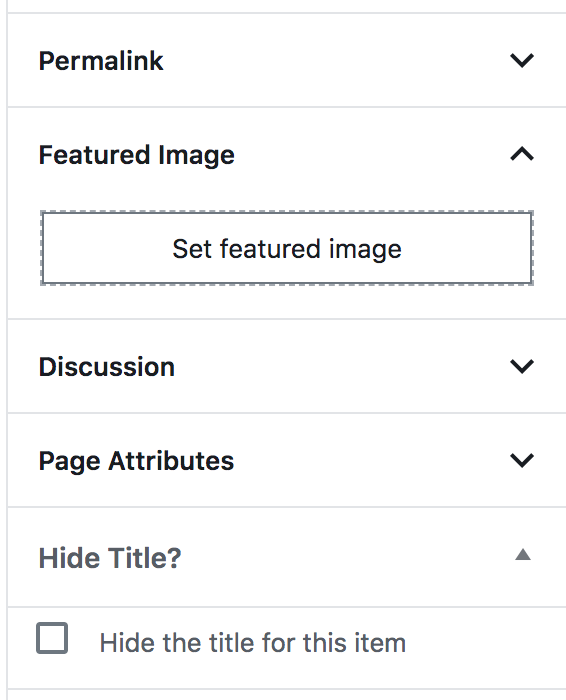
Click on “Set Featured Image.”
Step 4:
You will be prompted to select an image. You can either upload the image, or select it from your Media Library.

Step 5:
Select the image and then update your page.
That’s it! Your featured image should now appear on your page.
To Learn More:
The following video provides more information on Featured Images. (If video does not appear, scroll down for link.)
Add a featured image from WordPress 5 Essential Training by
For Support
If you encounter difficulty during any part of these tasks, please e-mail us at olt@iastate.edu for assistance, or stop by 306 Ross during our scheduled support hours.
If you cannot see the images in this documentation, click here.
Click here to return to the ePortfolio Support Site.