Welcome! In this tutorial, you will learn how to check or change the enrollment key on your course site. The first part of the article focuses on course sites that host one section of students, and the second part focuses on course sites that host two or more sections of students.
Enrollment key for one section (group) on one course site
Step 1:
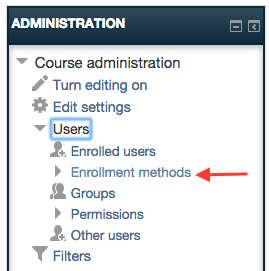
Click on “Users” in the administration block on the right-hand side of your Moodle page, then click on “Enrollment methods”
Step 2:
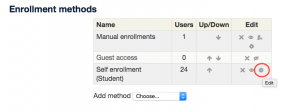
Next, on the Enrollment methods page, click on the little gear under “Edit” in the “Self enrollment (Student)” row.
Step 3:
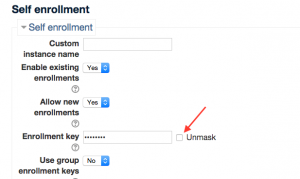
Step 2 will take you to the “Self enrollment” page. Check the “Unmask” block next to”Enrollment key”, and the enrollment key will be revealed. You can now view and edit the enrollment key. Click “Save changes” at the bottom of the page if you wish to edit the enrollment key, or “Cancel” if you only viewed it.
Enrollment keys for multiple sections (groups)
Step 1:
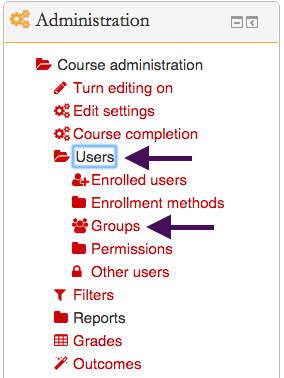
Click on “Users” in the administration block on the right-hand side of your Moodle page, then click on “groups”
Step 2:
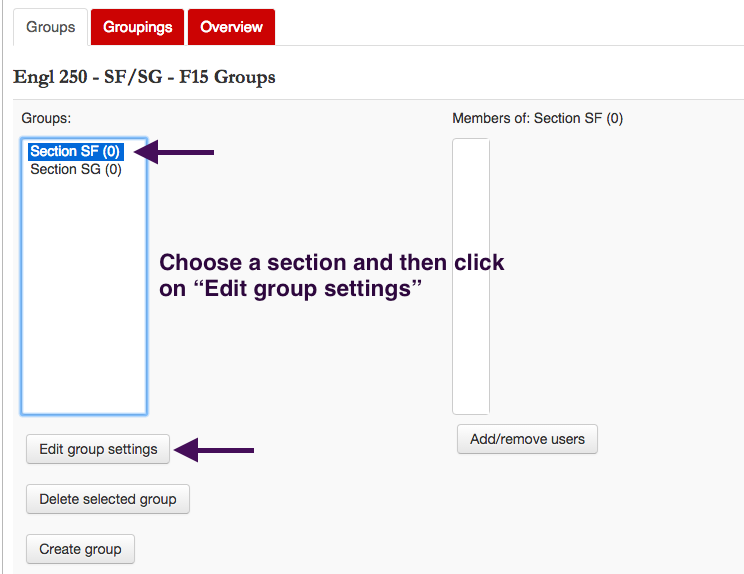
Click on one of the sections (groups) in your course and then click on “Edit group settings”
Step 3:
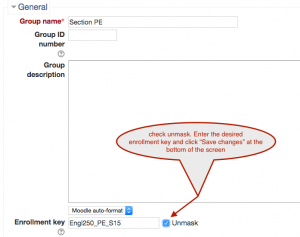
Check the “Unmask” block next to”Enrollment key”, and the enrollment key will be revealed. You can now view and edit the enrollment key. Click “Save changes” at the bottom of the page if you edited the enrollment key, or “Cancel” if you only viewed it.
NOTE: Some browsers may attempt to auto-fill these fields with saved information. If your Net-Id and password are appearing in the “Custom Instance Name” field and your password is appearing in the “Enrollment Key” field then you may want to use a different browser (preferably one that you do not use often–or at least one that has not saved your username and password).
Step 4:
Repeat steps 1-3 for the other section(s) in your course.
For Support
If you encounter difficulty during any part of these tasks, please e-mail us at olt@iastate.edu for assistance, or stop by 306 Ross during our scheduled support hours.
If you cannot see the images in this documentation, click here.
