In this tutorial you will learn how to create and use advanced forums (i.e., discussion boards) on your Moodle course site.
Before you begin, you might want to consider the differences between forums and advanced forums.
Basically, advanced forums can do everything that forums can do plus more. Here are some of the enhanced features available in advanced forums:
- See posting statistics: View the number of posts/replies.
- Grade forums easily: Grade student posts from within the forum.
- Allow anonymous forums: Users can post/reply anonymously and still receive credit.
- Subscribe more directly: Subscribe to specific topics within a forum rather than the entire forum.
- Highlight posts: Make certain posts stand out from others.
- Send a private reply: Send a private reply to a forum post so that only the original poster can view it.
If you feel that Advanced Forums is for you, then please continue reading. If you’d like a simpler version of discussion boards, please refer to the article about creating standard forums.
Step 1:
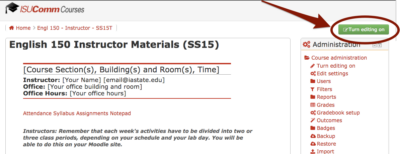
Click “Turn editing on” on the upper right-hand side of your screen.
Step 2:
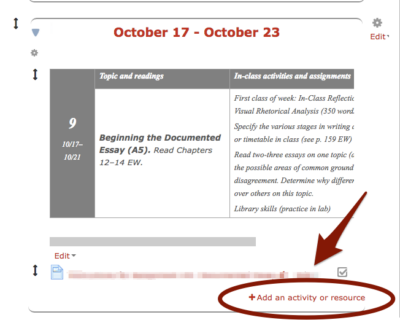
Choose the block in your course where you want to create the forum and click “Add an activity or resource” at the bottom of that block.
Step 3:
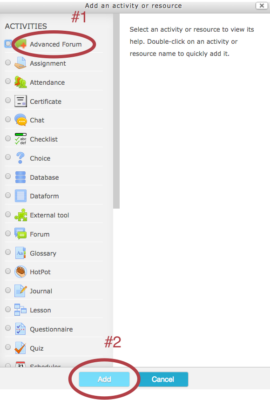
Select “Advanced Forum” from the menu that pops up and click “Add” at the bottom of the screen.
Step 4:
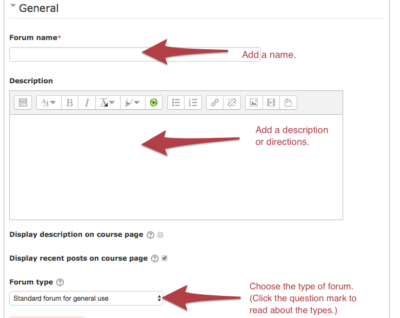
Add a “Forum name” and enter a short description. Choose a “Forum type.” A description of each of the forum types can be seen by clicking on the question mark next to “Forum type.”
Step 5:
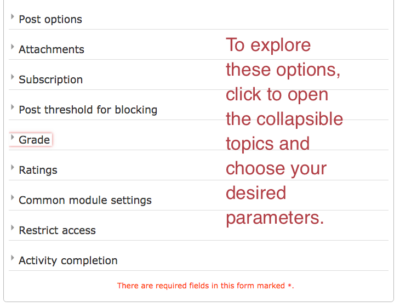
Other features of potential interest to teachers provide various options for posting, attachment, subscription, blocking, grading, ratings, and restrictions. You can learn more about all of these options by clicking on the question mark icon next to each category. When you have the settings tuned to your desired parameters click on “Save changes”.
For Support
If you encounter difficulty during any part of these tasks, please e-mail us at olt@iastate.edu for assistance, or stop by 306 Ross during our scheduled support hours.
If you cannot see the images in this documentation, click here.
