Welcome! In this tutorial you will read about the Workshop Activity. Workshop allows for peer assessment. Students can submit any digital content, such as Word documents, spreadsheets, or type directly into the text editor in Moodle.
Step 2: Fine-tune your Settings in “Phases”
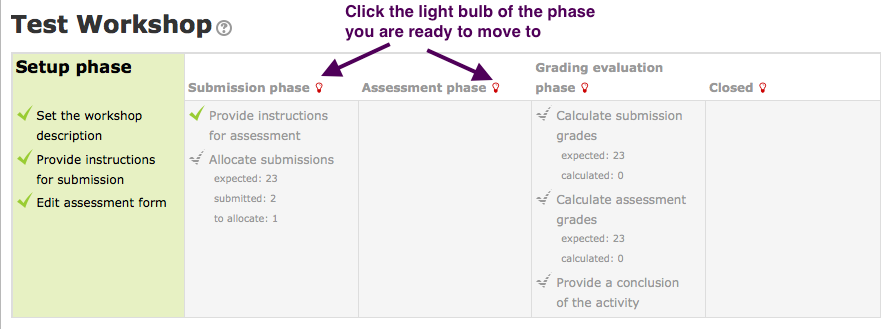
One main point that you as a teacher should know, is that the workshop is a peer review activity that the teacher moderates. As such, the students will provide feedback and grades (if allowed) to each other. The teacher moderates the activity by allowing students to move through the process. Once you create the phases of activity by following the steps below, you have to ‘open’ the phases to allow the students to progress. For example, students cannot submit a draft of their work until the teacher opens the “Submission phase”. This is done by clicking the light bulb next to that phase as depicted below.
Step 1: Create the Activity
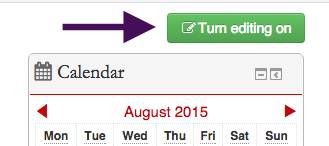
Click “Turn editing on”
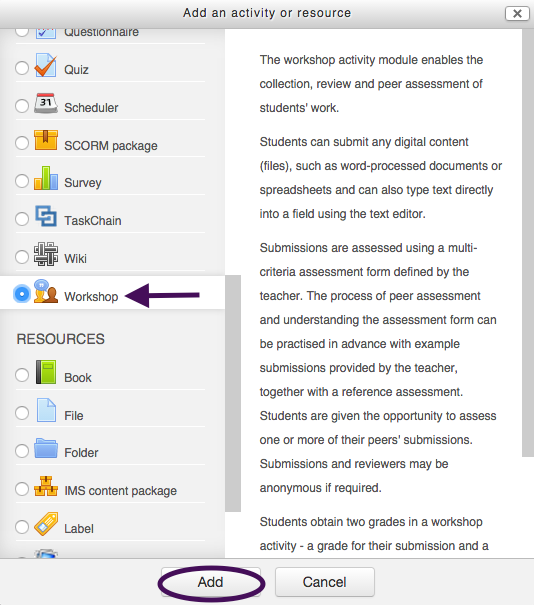
and “Add an activity or resource”

then choose “Workshop”
Settings
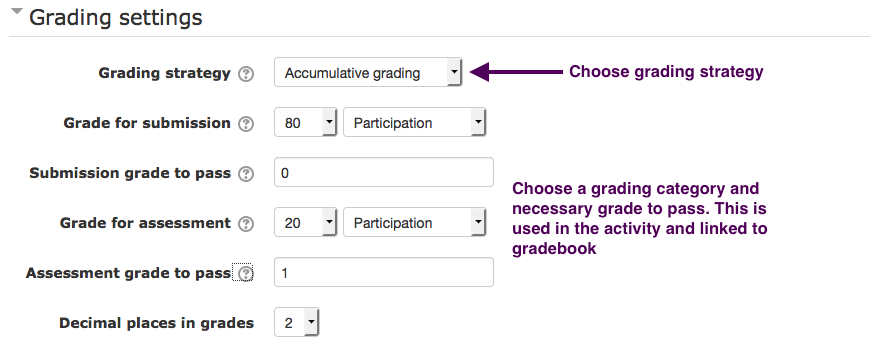
Choose the desired settings for the activity. For example, with the “Grading strategy” you can choose to let students comment and leave a grade (“Accumulative grading”), or just comment on each others’ work (“Comments”). Clicking on the question mark next to “grading strategy” will give information on all types of available grading strategies. You can also select the grading category here.
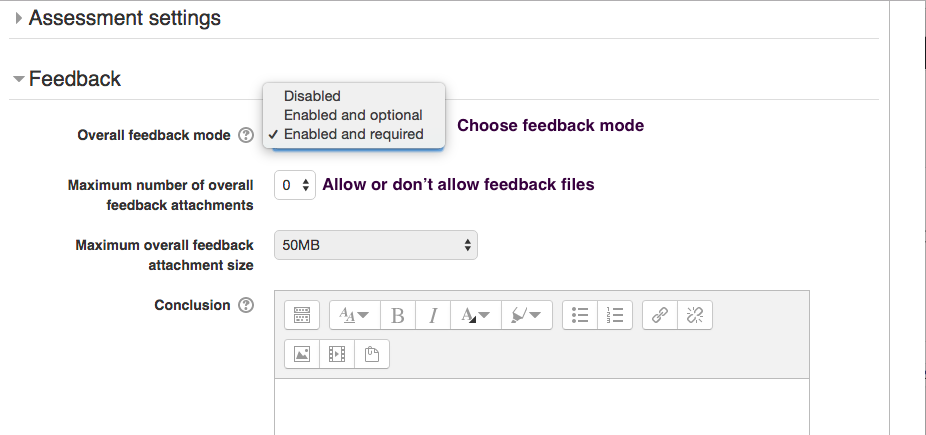
The instructor can also include instructions for assessment for students to follow and choose the “Overall feedback mode”. Feedback can be allowed within the Moodle or as attachments.
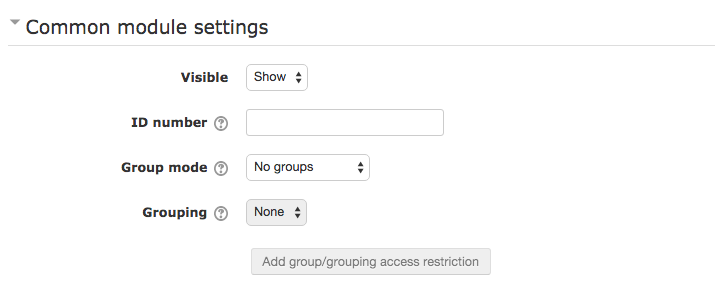
Finally, you can include groups. Groups are helpful if you want pairs or small groups to share an assignment (i.e., multiple names on one paper), but they aren’t really necessary if you have students reviewing individuals’ work as grouping students together to review each others’ work can be done later in the process by “assigning reviewers” in the “Assessment phase”. After you have the settings set up to your desired specifications, you can click “Save and return to course”. Don’t worry too much about all the settings when you set up the Workshop because you can (and will have to) add and probably adjust settings in the next steps.
Step 2: Fine-tune your Settings in “Phases”
Now that you have created the activity, click on the Workshop itself in your course site.
![]()
Set-up phase
Notice in the screenshot below that there are multiple phases to this activity. Each phase has its own settings. Any aspects of the workshop that haven’t been set up in the initial creation phase will be marked with a red ![]() . Many components in up-coming phases will have a grayed-out checkmark. You can click on any aspect to update the activity and edit it to meet the necessary requirements.
. Many components in up-coming phases will have a grayed-out checkmark. You can click on any aspect to update the activity and edit it to meet the necessary requirements.
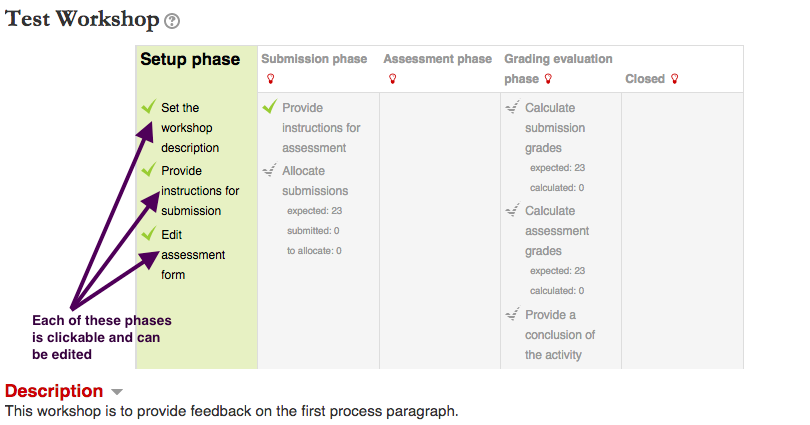
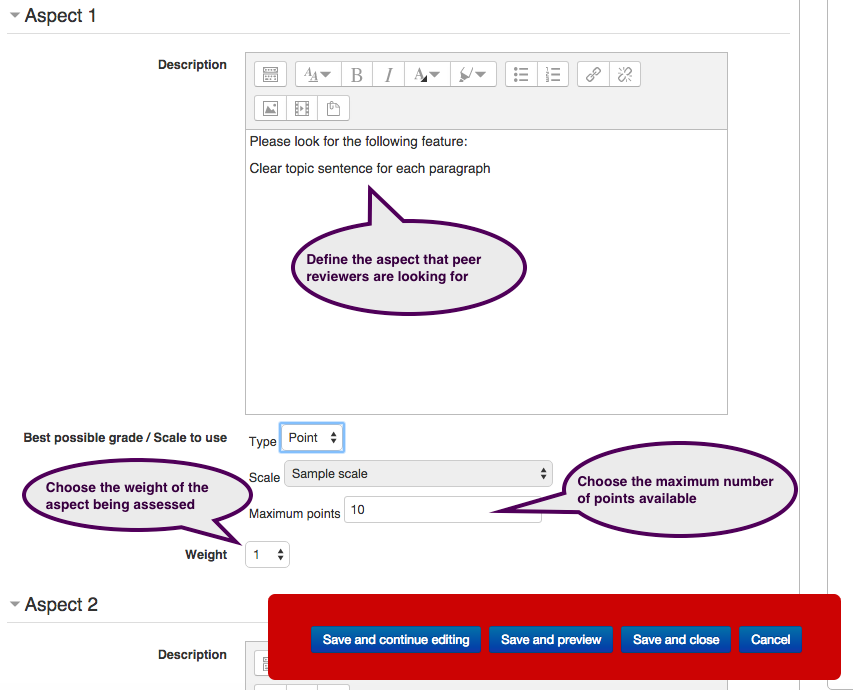
For example, if you chose “Accumulative grading” you can define the aspects of grading, values assigned to, and the weighting of each aspect under the “Edit assessment form”.
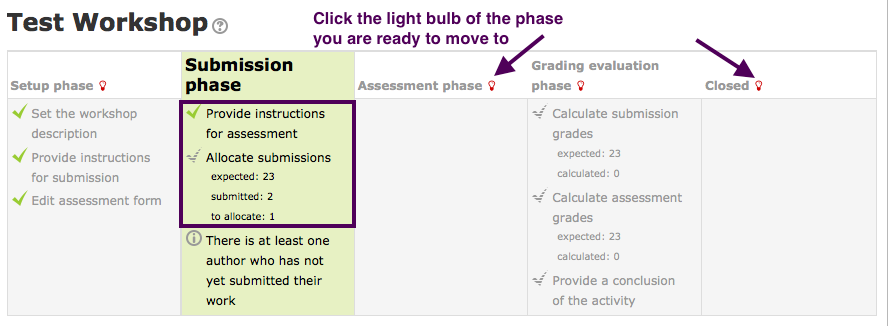
Submission phase
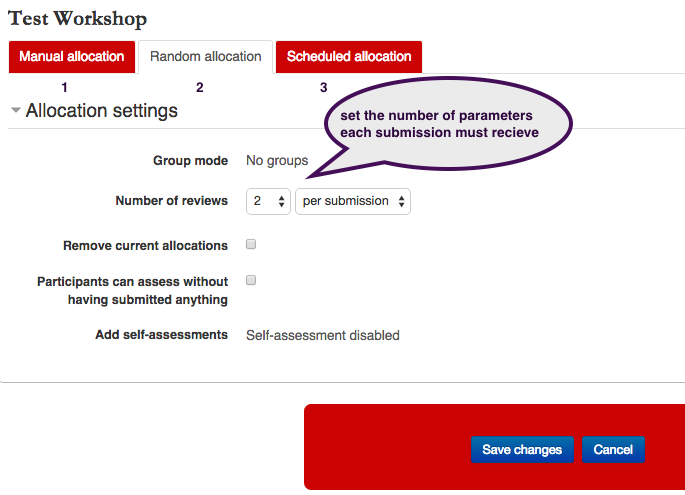
After you set up the workshop, you as the teacher have to transition the activity through the phases. You do this by clicking the red lightbulb in the top row. Click on the light bulb by “Submission phase” to open it up. Once students begin to submit assignments, the teacher can manually or randomly allocate them to peers in the class for peer review. Click on “Allocate submissions” to decide on these settings.
Assessment Phase
In this phase the teacher can assign submitted work to be assessed by other students who have submitted work. “Manual allocation” allows the teacher to assign one student’s work to another student for review. “Random allocation” allows the teacher to set a number of parameters (e.g., setting the number of reviews a submission must receive to continue with the review process) before randomly allocating reviews that comply with the set established parameters.
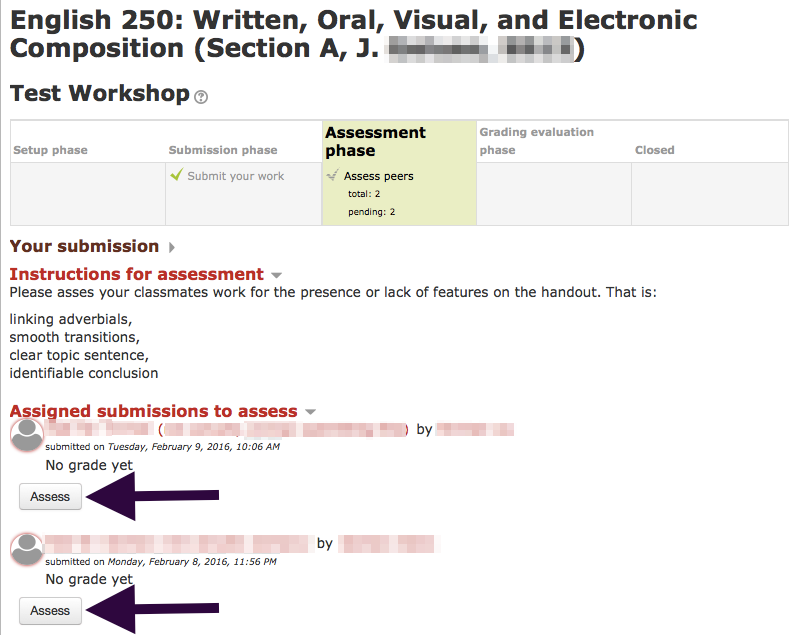
Students will see a screen similar to the one depicted below. They will have access to the work done by other students they are assigned to evaluate. Students click the “Assess” button to assess the work of their peers.
Grading evaluation phase
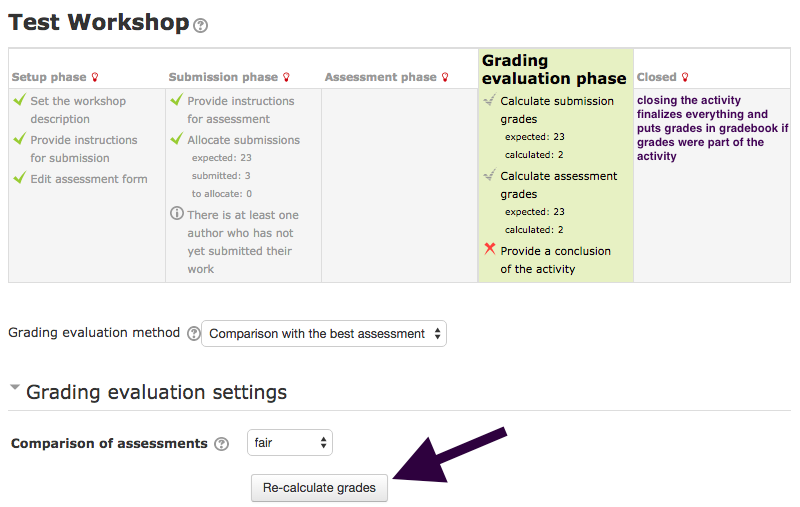
Once the teacher moves to the “Grading and evaluation phase”, all the assessments by the students will be calculated. The teacher can achieve this by clicking on the “(Re)calculate grades” button. After grades are calculated, the teacher can close the activity. Once the activity is closed grades will imported into the gradebook if grades were made to be part of the activity.
For Support
If you encounter difficulty during any part of these tasks, please e-mail us at moodle@iastate.edufor assistance, or stop by 306 Ross during our scheduled support hours.
If you cannot see the images in this documentation, click here.