Welcome! In this tutorial you will learn the basics about getting up and running with the video conferencing software called “Zoom” and learn some of its basic, but powerful, functions.
Step 2. Hosting or joining a meeting
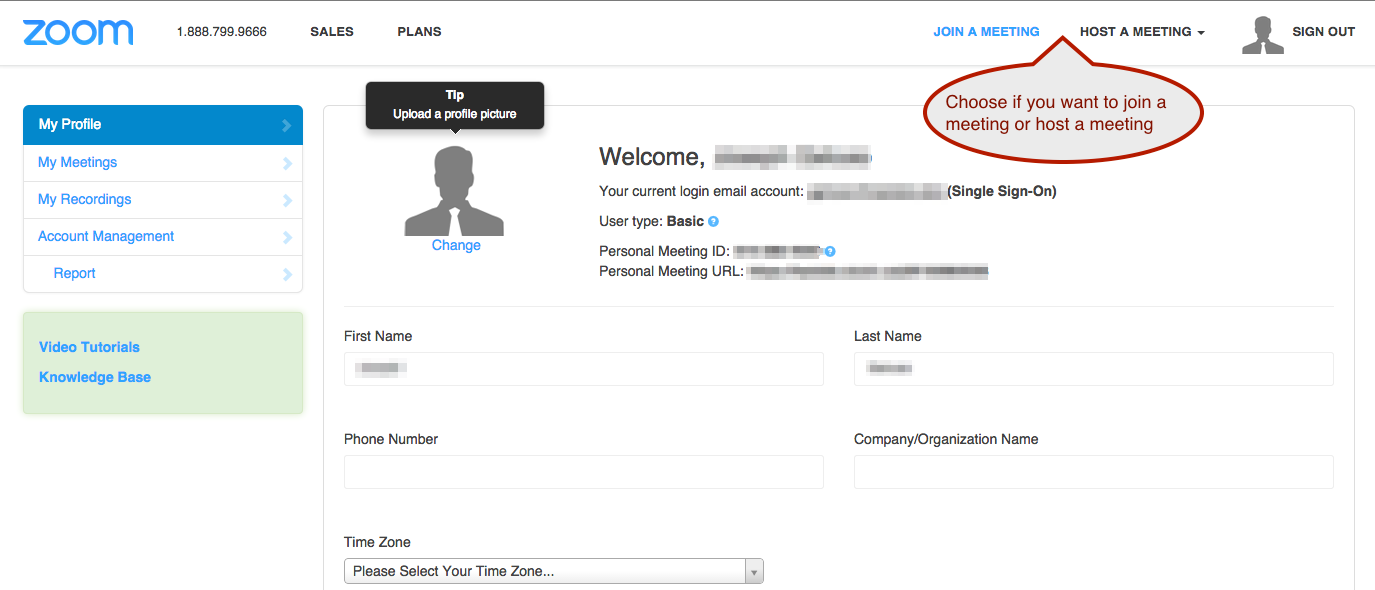
Step 1. Accessing Zoom
Iowa State has an Zoom account which can be accessed here. Once on the page you simply sign in using your ISU net ID and password.

Step 2. Hosting or joining a meeting
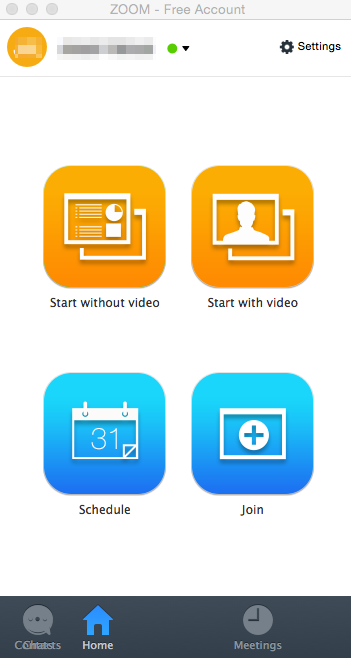
Click on “host a meeting.” Choose whether you want the video feature on or off.
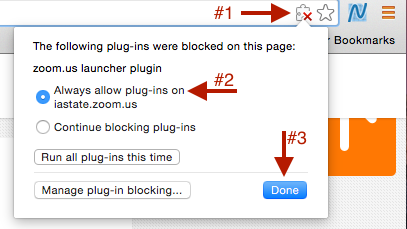
You might get a pop-up that asks you to allow plug-ins in order to use the software. To allow the necessary plug-ins, follow this procedure: 1) click on the little puzzle piece in the top URL bar; 2) select “Always allow plug-ins on iastate.zoom.us”; and 3) click “Done”.
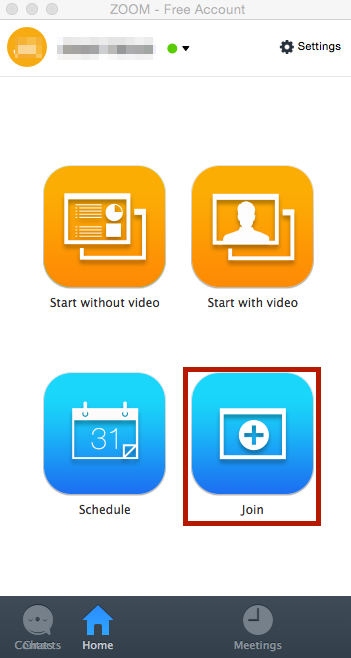
You will now have the option to start a meeting with or without video, to join a meeting, or to schedule a meeting for a future date. If you choose to schedule a meeting for a future date, you can manage the schedule in different calendar software, e.g., iCalendar or Google Calendar.
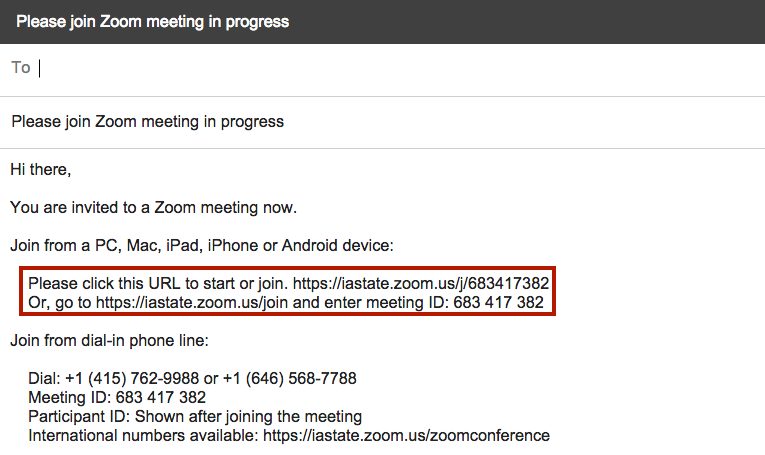
Participants can be invited to join a meeting in a variety of ways, for example, social media, instant message, or email. Below is a screenshot of an email invitation. You can see that recipients can join by simply clicking a URL or by navigating to the ISU Zoom webpage and entering the meeting ID.
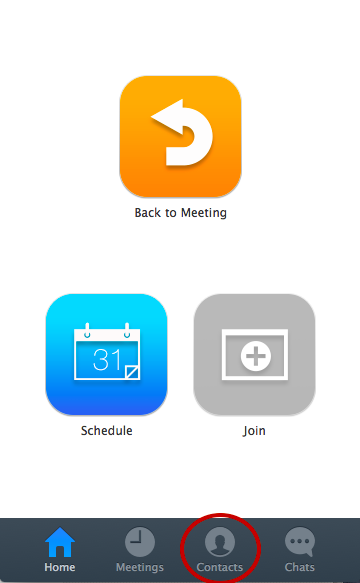
If users have a meeting ID, a meeting can be joined by clicking “join” on the main menu and pasting or entering the meeting ID number into the appropriate field. Users can also click on contacts on the bottom of the main menu, peruse their contacts and send a request to join a meeting, similar to how one might send a call request to a contact in Skype.
Step 3. Settings and features
When hosting a meeting, the bottom of the Zoom window will feature the tool bar pictured below. With this tool bar you can do things like control audio, video, inviting and managing participants, screen sharing, and record the meeting. If you enter your meeting and can’t hear anything, you might first check whether or not there is a red X next to speaker icon on the far left.
![]()
Screen sharing and annotating
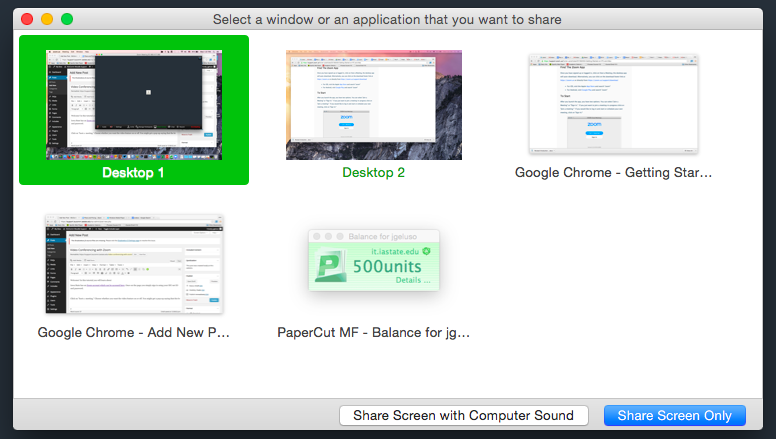
Under the screen sharing option, you can select from particular windows to share and desktops if you are running multiple desktops.
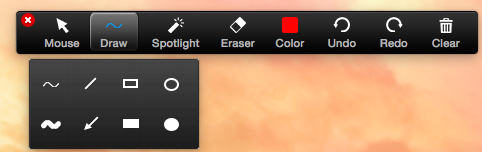
Zoom offers quite fine control over the screen sharing allowing users to pause the screen share, switch windows within screen share, draw on and annotate the screen being shared, and stop the screen share.

clicking on “Annotate” for example, allows you to use a spotlight effect (a little glowing red ball) to direct viewers’ attention to a particular location on the shared screen, and the draw option allows the user annotate the screen with arrows, shapes, or free-form lines.
For Support
If you encounter difficulty during any part of these tasks, please e-mail us at moodle@iastate.edu for assistance, or stop by 306 Ross during our scheduled support hours.
If you cannot see the images in this documentation, click here.