This feature allows you to admit people to your Webex room when you are ready to see them.
Step 1
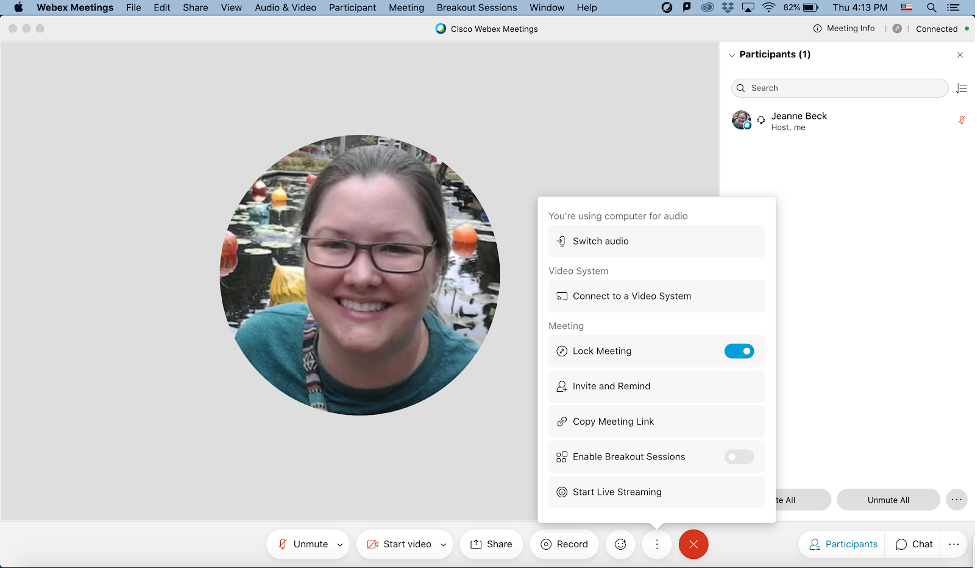
Upon starting a meeting, click the icon with three dots on the bottom right of your screen near the End Meeting button to access More Options. Then click Lock Meeting. This will prevent any additional attendees from joining your meeting, keeping them in your lobby until you admit them.
Step 2
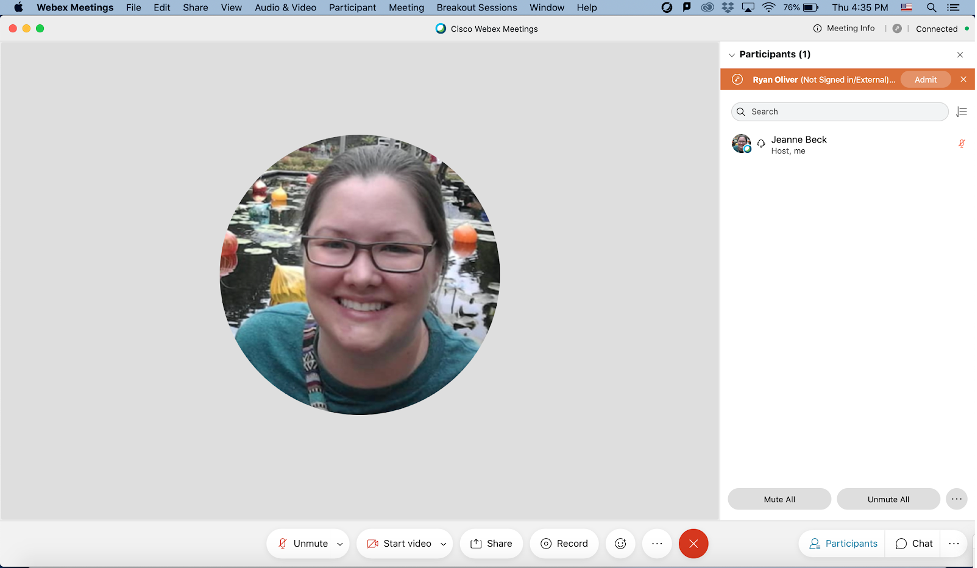
As the meeting’s host, you will see a list of people who are waiting in your lobby on the upper right side of your screen. From here, you can choose who to allow into your meeting by clicking the Admit button next to their name.
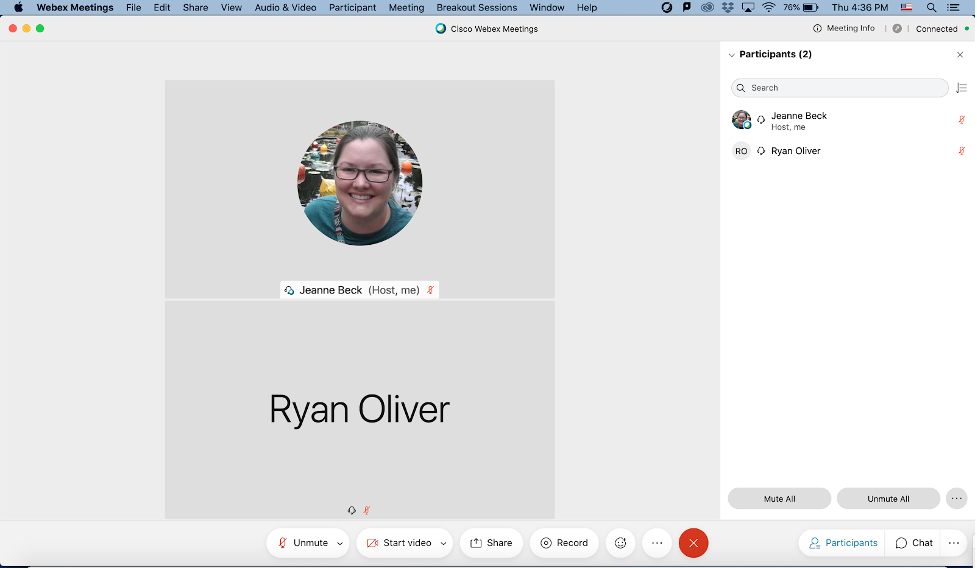
The user(s) you admit will then be listed as participants on the right side of your screen.
Automatically Locking your Personal Room
Step 1
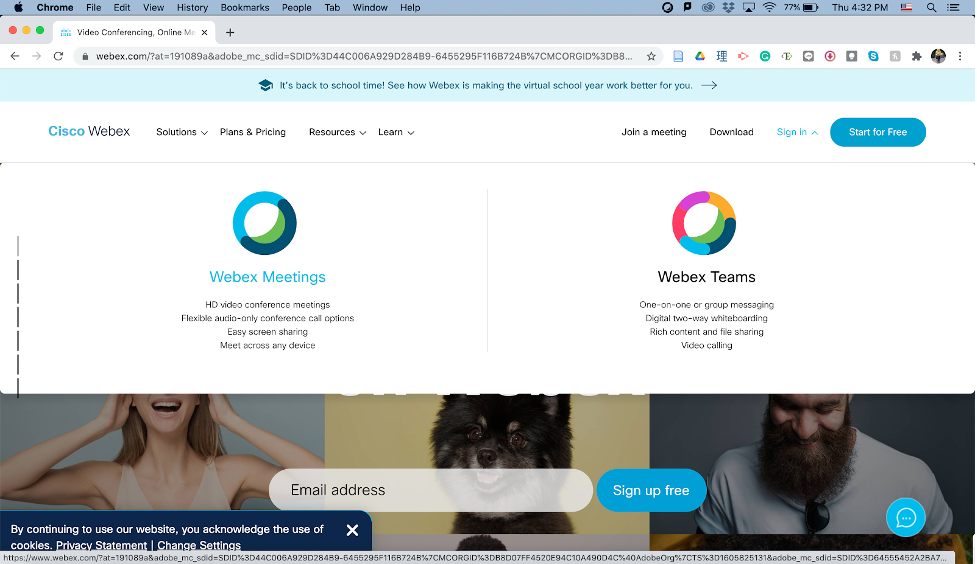
Log into your Webex account by visiting Webex’s website, clicking Sign In and then clicking Webex Meetings. Sign in using your ISU email address.
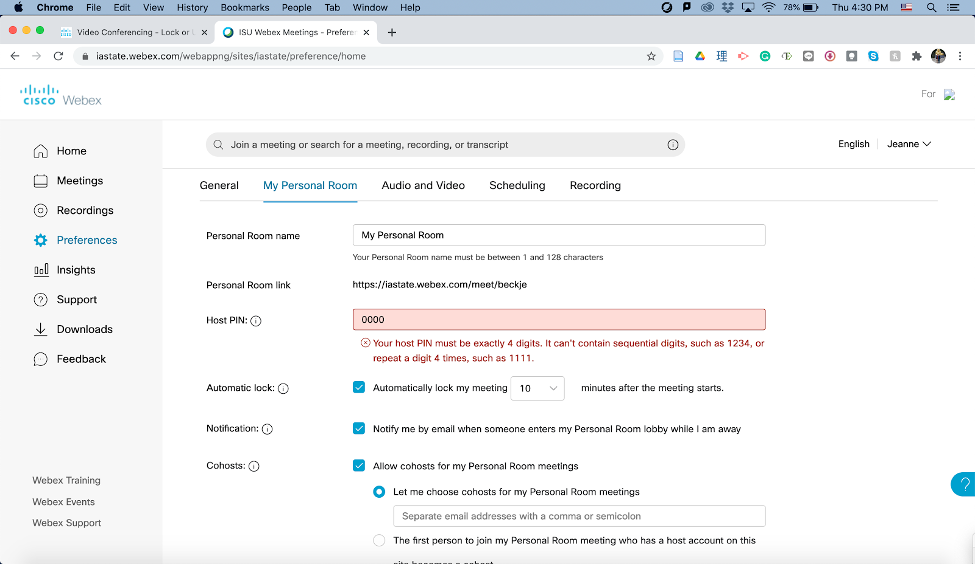
Step 2
From the home menu, click Preferences on the left hand side, then click My Personal Room. Under this section, check the box next to Automatic Lock and specify how many minutes you want to elapse before your meeting locks. You can set your meetings to lock after 0, 5, 10, 15, or 20 minutes have elapsed.
For Support
If you encounter difficulty during any part of these tasks, please e-mail us at olt@iastate.edu for assistance. We will respond within 24 hours.