Welcome! In this tutorial, you will learn how to upload files to your course website.
There are three ways to upload a file.
Part 1. Drag and Drop in the course front page.
The easiest way to upload a file is to:
1. Turn editing on
2. Simply drag and drop a file from your computer into the bottom area of the block.
3. From there you can control the location of the file by clicking on the cross next to the file and dragging the file to a new location
Part 2. Drag and drop the files in an activity.
1. Click on the any activities (e.g. assignment submission).
2. The easiest and the fastest way to upload the file is to drag and drop files into the dropbox.
Part 3. Upload files in the HTML editor
1. Click on any activities.
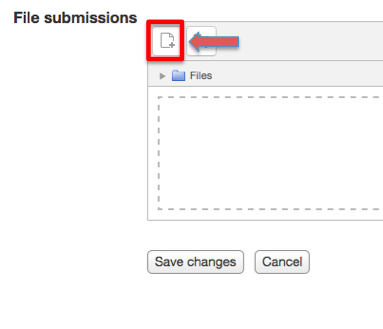
2. You can find a file in a folder in your computer manually by clicking on the icon on the left top of the dropbox.
(This method sometimes works better with different file types, like Pages, if drag and drop doesn’t work.)
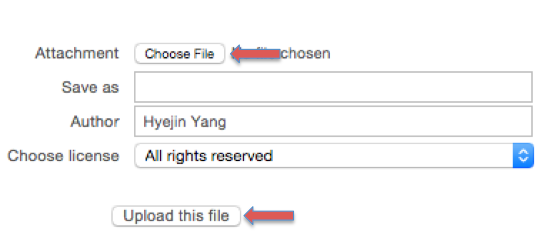
3. Click on “Choose file” and select the file your want to upload. Then, click on “Upload this file.”
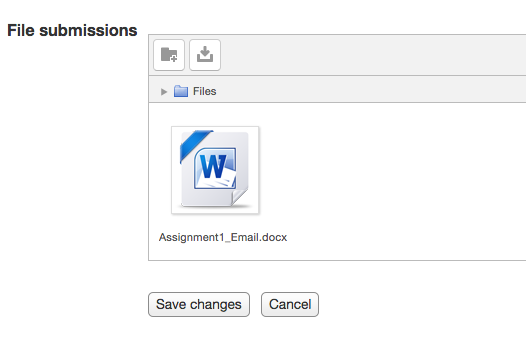
4. You will see the image in the dropbox if you successfully upload the file.
You can also delete it by right-clicking on the image.
After you check the file submission, click on “Save changes” to finish it.
For further information
You can watch the video tutorial.
For Support
If you encounter difficulty during any part of these tasks, please e-mail us at moodle@iastate.edu for assistance, or stop by 306 Ross during our scheduled support hours.
If you cannot see the images in this documentation, click here.


