Welcome! In this tutorial you will learn about creating screencasts in Panopto and how using the screencast function can be a workaround to uploading completed videos to Panopto.
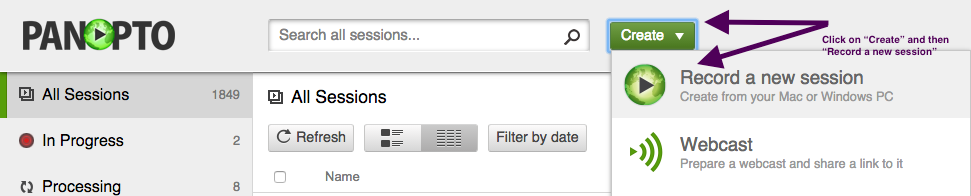
Step 1
Once logged into Panopto and in the appropriate folder, click on “Create” and “Record a new session”.
Once you click on “Record a new session” an automatic “External Protocol Request” will appear asking to launch the “Panopto Recorder”. Click “Launch Application”.
Step 2
Next, click on “Create New Recording”.

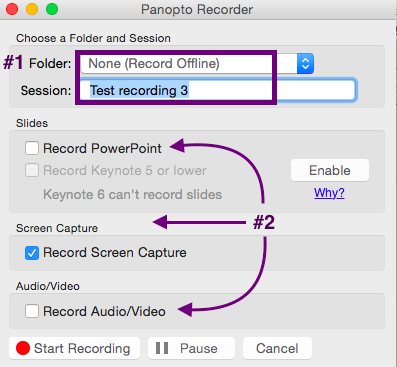
Step 3
A dialogue box will appear. As marked in the image below, one can choose:
1) a folder to house the recording or “session” and name the session. If you choose not to name the session it will simply bear the date and timestamp of when the recording was made.
2) The type of presentation to record: a PowerPoint presentation; a screen capture; audio/video recording using a webcam and microphone; or an audio/video using a webcam to accompany a PowerPoint or screen capture.
For Support
If you encounter difficulty during any part of these tasks, please e-mail us at moodle@iastate.edu for assistance, or stop by 306 Ross during our scheduled support hours.
If you cannot see the images in this documentation, click here.