Welcome! In this tutorial you will learn how to crop PDF files and images on:
You may encounter a PDF or image that captures more screen than it needs to, like the one below

In the case above you might want to remove some of the excess black area. To do this, you can follow the following steps.
1. On a Mac
1) Double click on the PDF file you want to crop. On a Mac it should automatically open in the Preview application. Preview’s icon is depicted below.
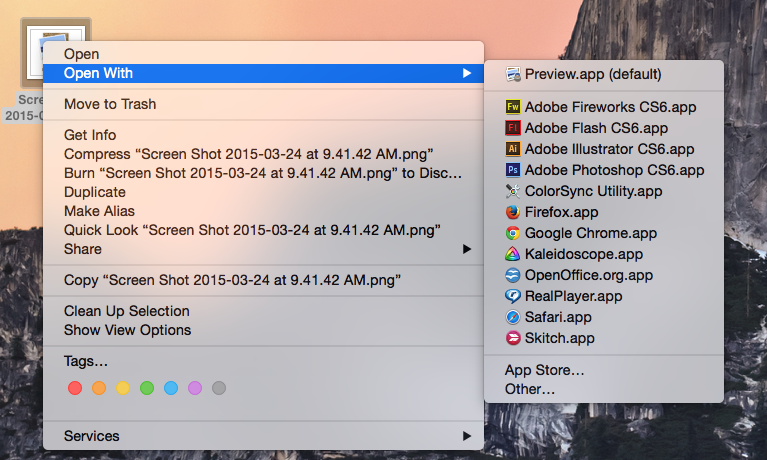
If it doesn’t open in Preview automatically, control + click on the PDF and select “Open with” and choose Preview.
2) Click on the “Markup” icon on the right side of the toolbar in Preview (it looks like a toolbox), and then click on the crop icon on the left side of the toolbar.

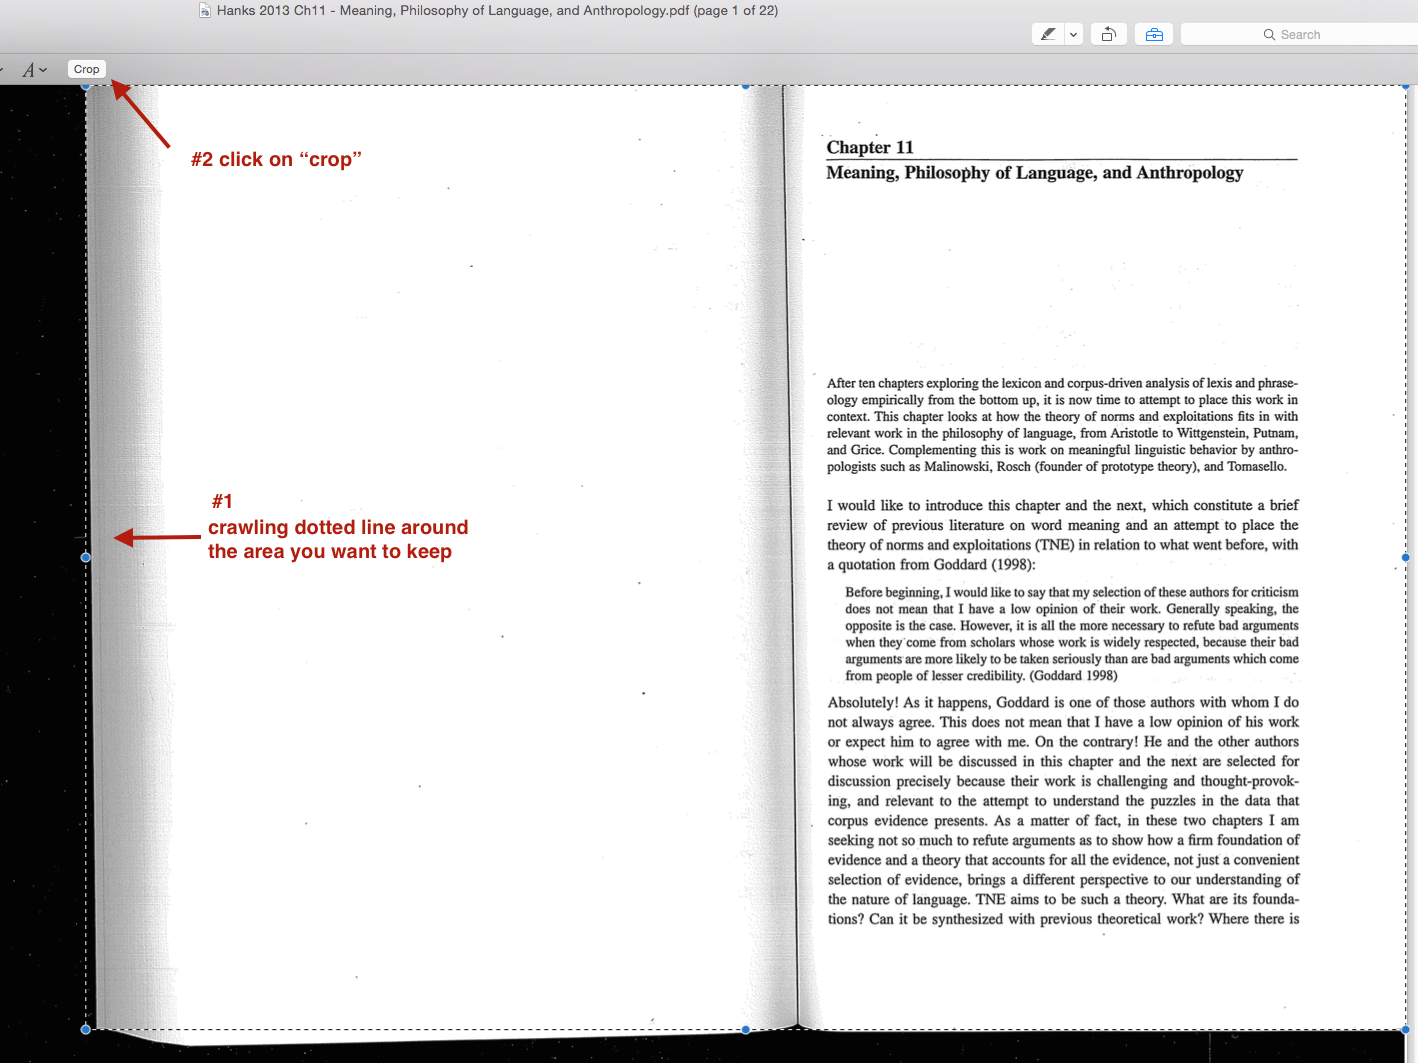
3) Click on the image within in the PDF file and drag the “crawling dotted line” around area that you want keep and click on “Crop”
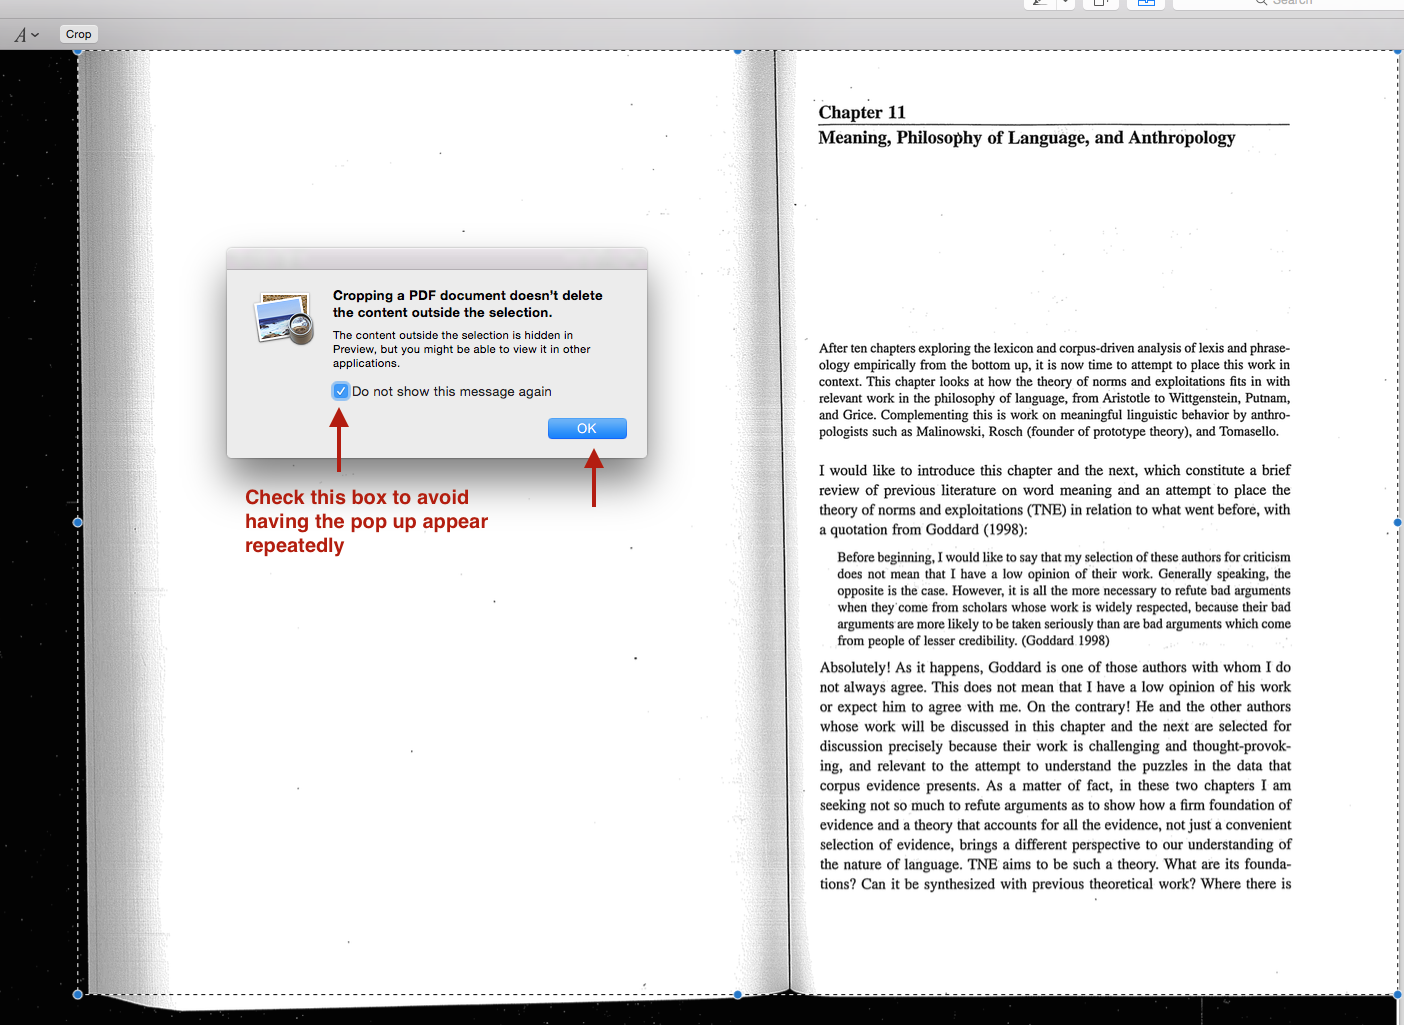
4) A pop-up explaining what you are about to do will appear. You may want to check the box to prevent the pop-up from appearing each time you crop a page within your PDF.
5) Here is a comparison between a page in a scan that has been cropped and one that hasn’t.
2. On Windows
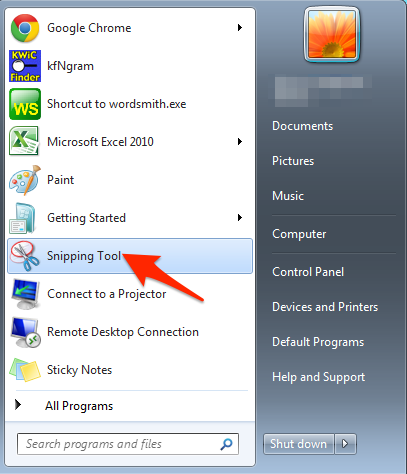
1) Open the “snipping tool” from the Windows menu at the bottom of your computer screen. (You can search “snipping tool” in the “Search programs and files” field to find the app more quickly.)
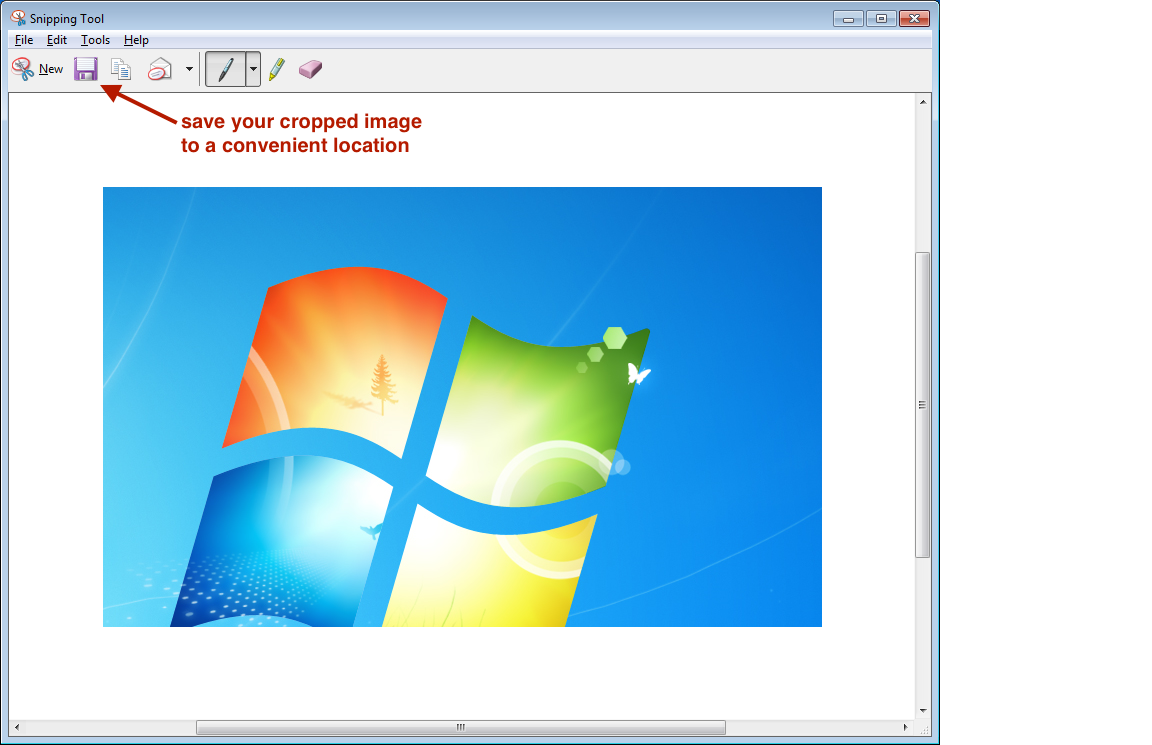
2) Once Snipping Tool is open you will have the “crosshairs” on your screen and can drag it around the selection that you want to remain. The selection you chose will pop up in the Snipping Tool app and you can save it to a convenient location from there.
For Support
If you encounter difficulty during any part of these tasks, please e-mail us at moodle@iastate.edu for assistance, or stop by 306 Ross during our scheduled support hours.
If you cannot see the images in this documentation, click here.