Welcome! In this tutorial, you will learn how to add and edit groups. Groups allow you to group students together for online discussions, chat for group projects, and complete online group activities.
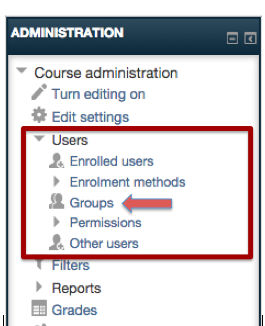
Step 1.
Locate the “Settings” navigation bar located on the right-hand side of your screen. Click “Users” and then “Groups.”
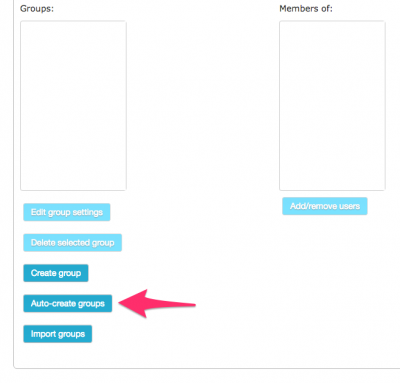
Step 2.
To create groups automatically, click the “Auto-create groups” button. This will take you to the setup page for auto groups. Select the appropriate settings for your auto-created groups. You may click on the “Show Advanced” button for more options.
After selecting your group options, click “Submit.”
After selecting your group options, click “Submit.”
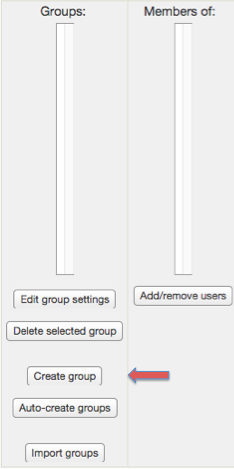
Step 3.
To create groups manually, select the “Create group” button.
This will take you to the setup page for creating new groups.
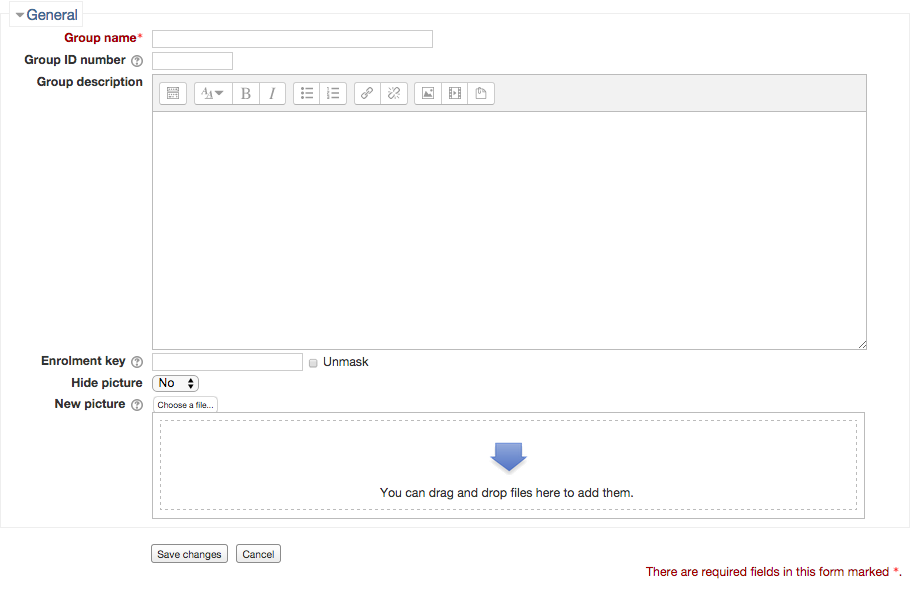
- Group name –Required field. Enter the name of your group.
- Group description – Enter a description of your group.
- Enrollment Key – If you want students to enroll in groups themselves, you may want to include an enrollment key so students can only enroll in the groups you assign them.
- Hide picture – If you include a picture for the group, this choice allows you to show or hide the picture.
- New picture – You may choose to upload a picture to represent the group.
- After selecting your group options, click “Save changes.”
Step 4.
- To add members to your new group, select the group you want to add members to.
- Then, under “Members of:” box, click on “Add/remove users” button.

- Click the “Add” button to select the student(s) you want in your group.
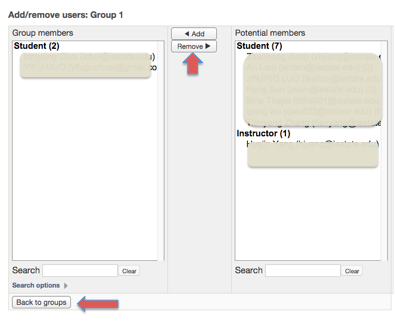
You will see the student’s name pop up under the “Group members” box. Once you’ve added the correct students to your group, click the “Back to groups” button.
Edit Groups
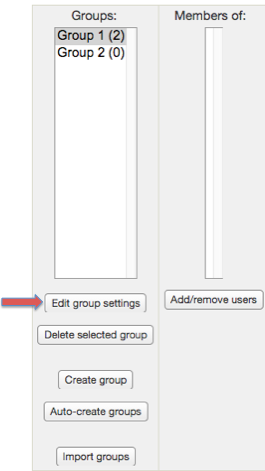
- To edit a group, locate the “Groups” settings page.
- Select the group you want to edit from the “Groups” box.
- Click on “Edit group settings” button and edit your settings.
- Click “Save changes” to submit your new changes.
Delete Groups
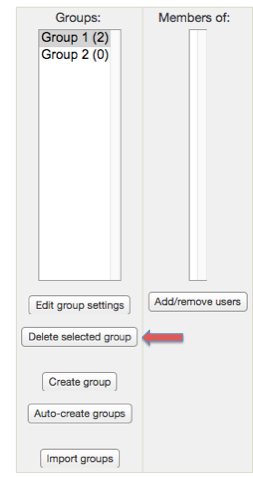
- To delete groups, locate the “Groups” settings page.
- Select the group you want to delete from the “Groups:” box. Click on the “Delete selected groups” button.
For Support
If you encounter difficulty during any part of these tasks, please e-mail us at moodle@iastate.edu for assistance, or stop by 306 Ross during our scheduled support hours.
If you cannot see the images in this documentation, click here.