One of the major components of your ePortfolio is Visual Communication. A good way to demonstrate your skill in this mode is to showcase your presentation slides. With your ePortfolio you can embed a PowerPoint presentation into a Page or Post. A typical PowerPoint is usually too big of a file, so this article will show you how to do so by linking to a PowerPoint presentation in your Cybox account. For information about what Cybox is and how to use it, read this Support Article here.
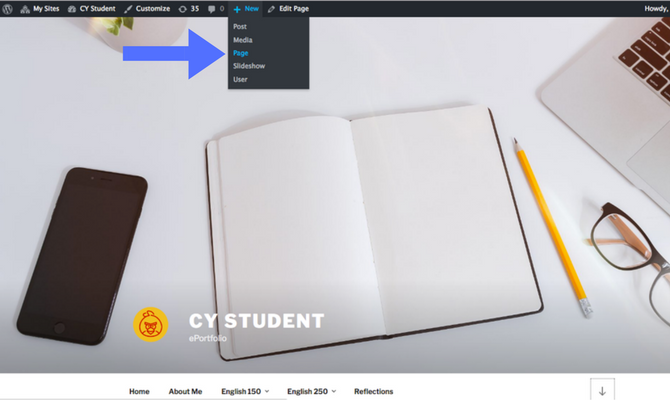
Step 1
One your ePortfolio homepage, click the + New icon and select Page.
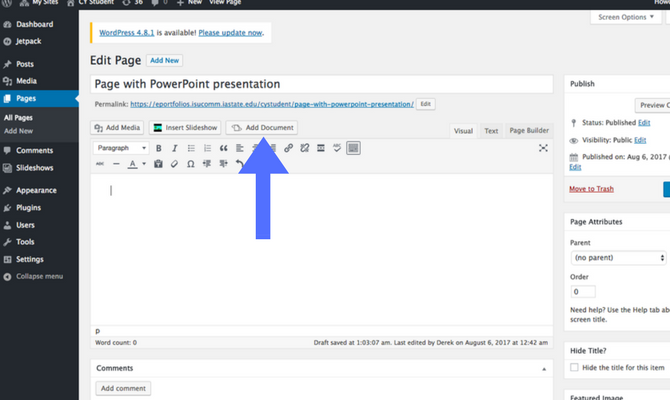
Step 2
Give your page a title and then click the Add Document (or Add Media for Videos in Cybox) button on the top of the text editor box.
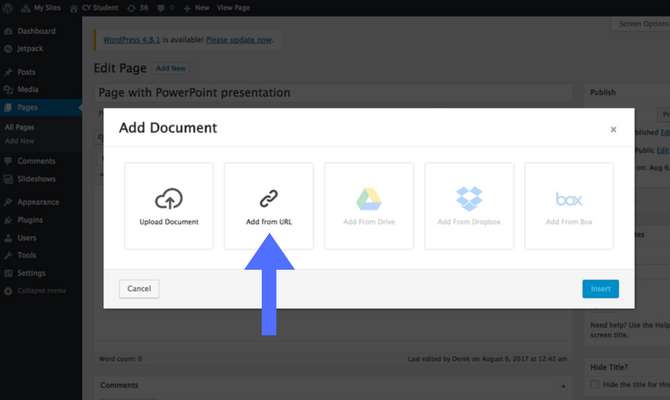
Step 3
A pop-up box will appear with a couple of options for adding a document. Select the Add from URL button. Once you go to the next screen, open a new tab or window in your browser and log into your Cybox account.
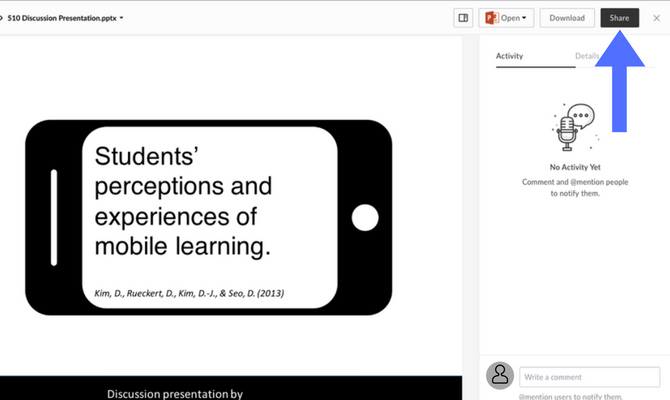
Step 4
Find your PowerPoint presentation in your Cybox and open the preview. In the preview screen, click the Share button in the upper right corner.
Step 5
You will see a shared link pop-up box. Before you copy that link, you need to take a few different steps. Click the People in this folder link.
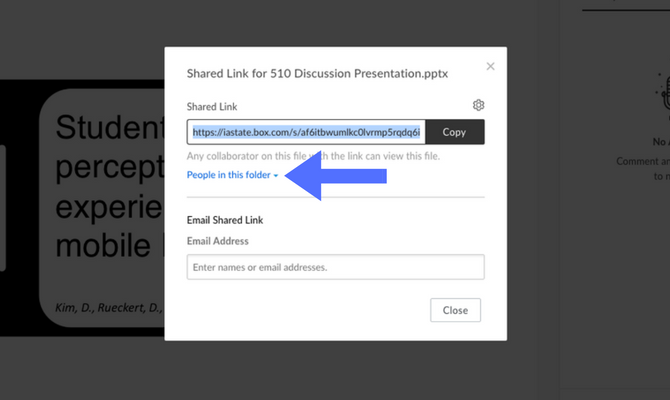
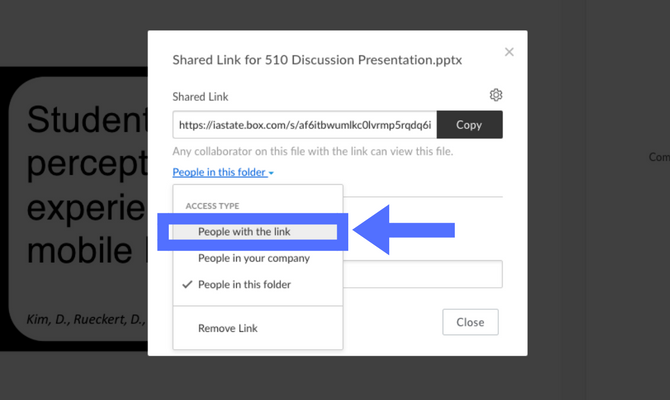
Step 6
Select the People with the link option in the dropdown menu for access type. This will ensure your PowerPoint appears in your ePortfolio page, so make sure you choose this option.
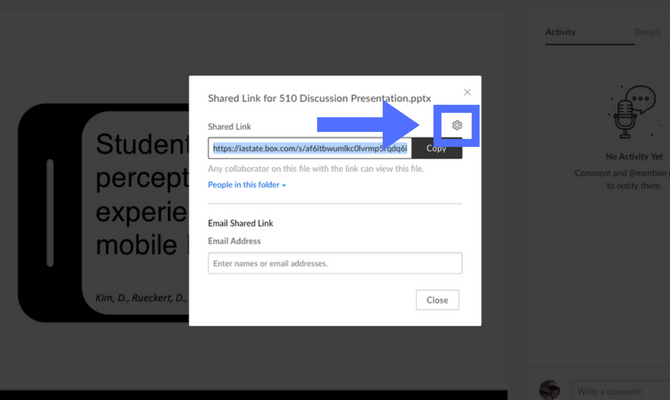
Step 7
Once you have the people with link option selected, you are still not done. In order to make your presentation embedded, click the gear icon right above the copy button. You do not want to copy the share link because it is only a link to the file.
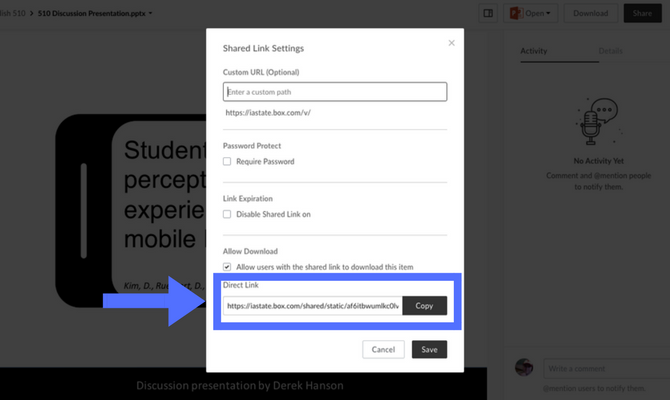
Step 8
You will arrive at a new pop-up screen. From here, select the Direct Link at the bottom by either highlighting and copying the URL, or you can simply click the Copy button.
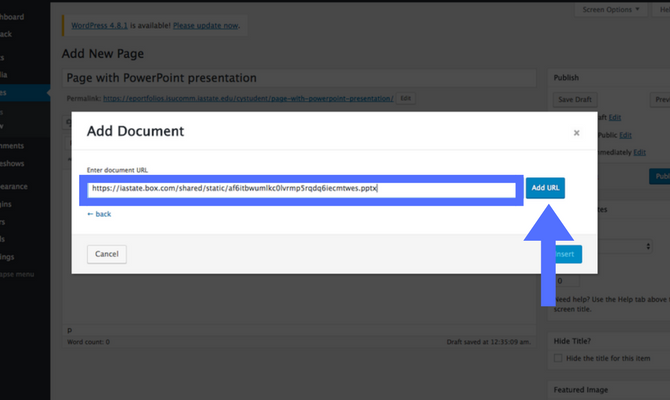
Step 9
Once you’ve copied that Direct Link, go back to your ePortfolio and paste it into the Add Document box. Click Add URL. You will see the embed code generated with a couple advanced options. Here you can adjust the size of the viewer and download link options. An important note is to look at the Viewer option on the far right. You can choose either Google Docs or Microsoft Office Online. You may find that your PowerPoint won’t show up or look the way you want, and this is one place where you can try to troubleshoot that issue. If Google viewer does not display properly, try the Microsoft viewer.
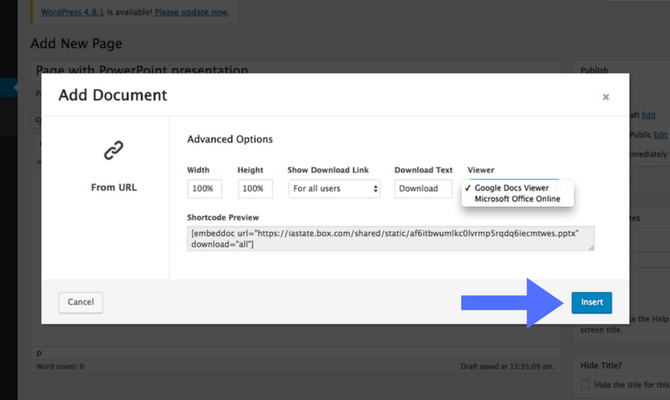
Step 10
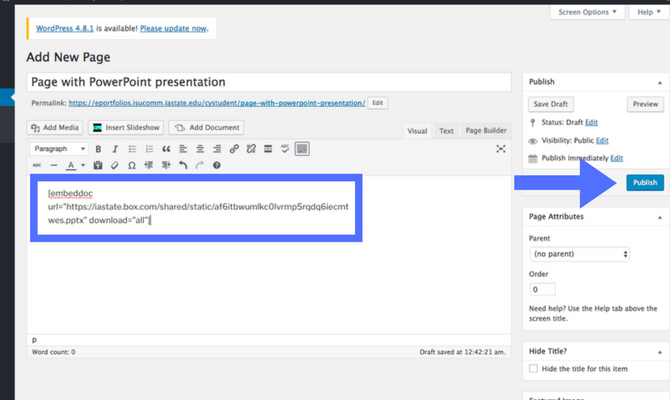
Once you select Insert, the shortcode will appear in your text editor box. Don’t be worried when you see all this text in the brackets. WordPress will generate that code and make appear in your page, just be careful to not delete any part of the code. You can write your other content above or below your PowerPoint. When you are satisfied with your page, click the Publish button. Your PowerPoint should appear in a viewer on your page. You can scroll through it, click the pop-out icon in the upper right corner to view full screen, or you instructor can download the PowerPoint with the link below the file.

For Support
If you encounter difficulty during any part of these tasks, please e-mail us at olt@iastate.edu for assistance, or stop by 306 Ross during our scheduled support hours.
If you cannot see the images in this documentation, click here.