If you would like all of your ePortfolio content to appear in one main menu, here is where you will need to work on naming and organizing your content. Below you will see the steps to create a new page for English 150 to serve as the main tab. Then, we’ll show you a menu that has a structure with dropdown menu items.
Step 1: Create a new page for English 150
Create a new page to act as the main tab for your ePortfolio 150 components. You can determine the content of the page, but for this example, we are showing you how to add hyperlinks to the specific pages of your 150 content.
Title your page and add your content.

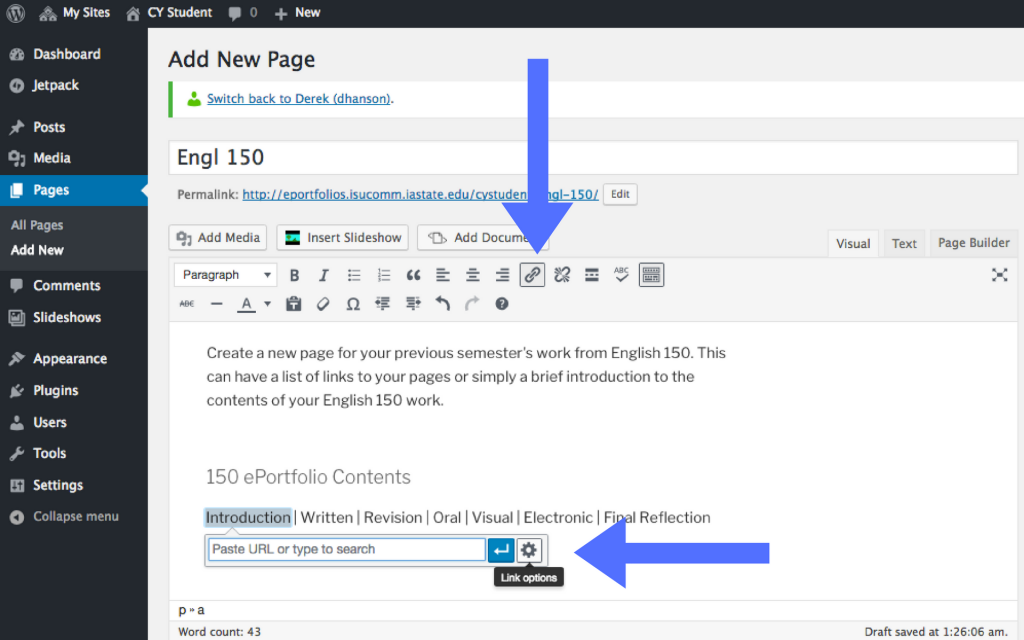
Highlight one of the components of your 150 ePortfolio (Introduction shown here). While the word is highlighted, click the hyperlink icon in the text editor toolbar. Once the box appears to Paste URL, instead click the gear icon for link options.
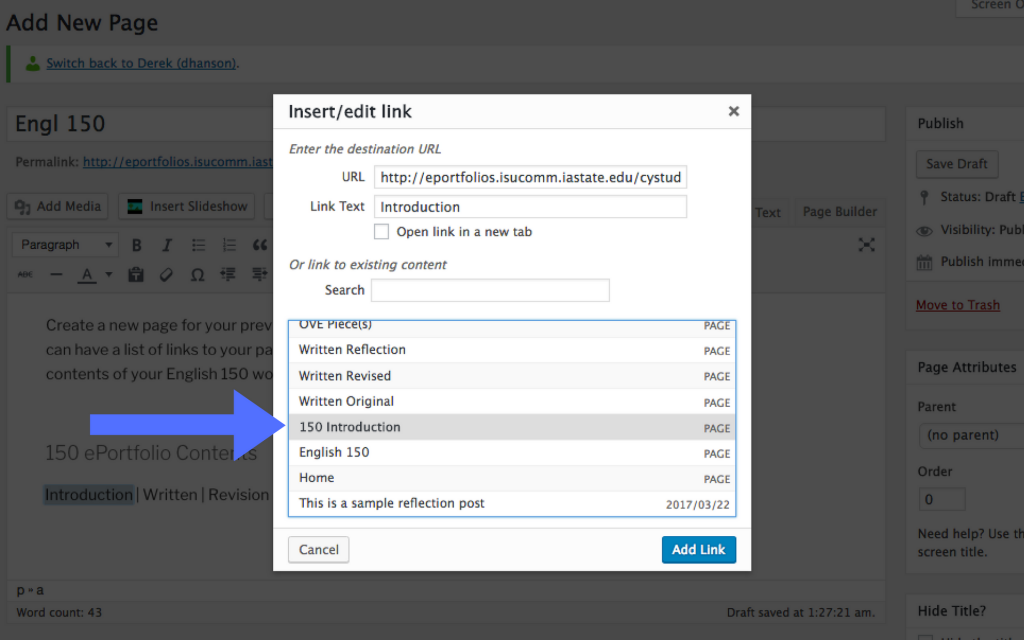
Now, search for the page you would like to link to within your ePortfolio. Once you find the correct page, click Add Link.
Repeat this process for each item you want to link to on this page.
You now have a new page that serves as the main tab for English 150 ePortfolio contents. Follow these same steps to create a main tab item for English 250.
Step 2: Creating a Combined Menu
Create a New Menu and call it 150/250 Menu. Add all your pages from your 150 and 250 ePortfolio. Be sure to add the English 150 page you created in the previous step here.
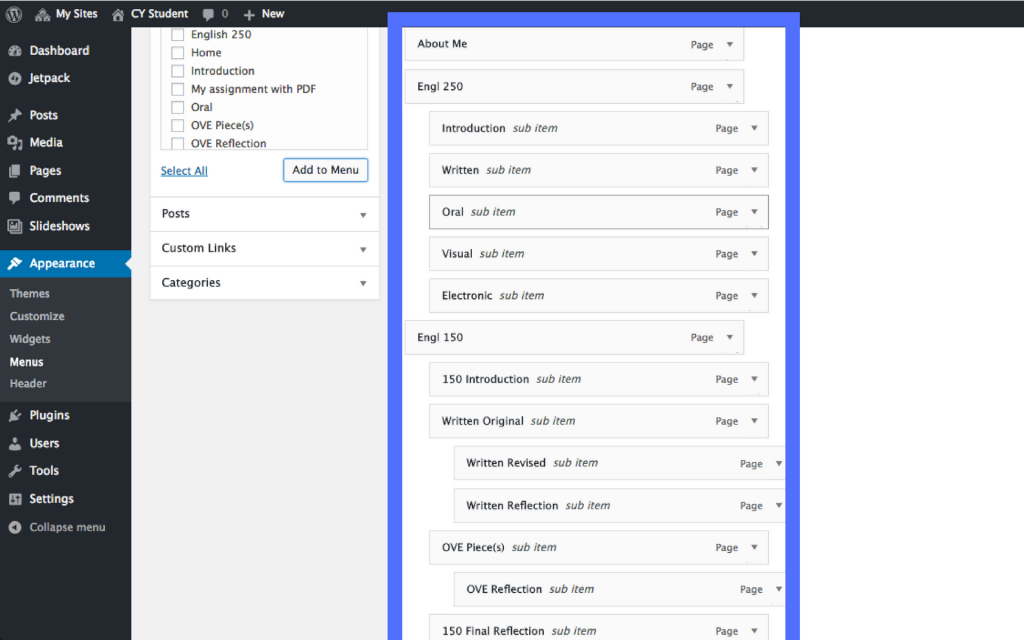
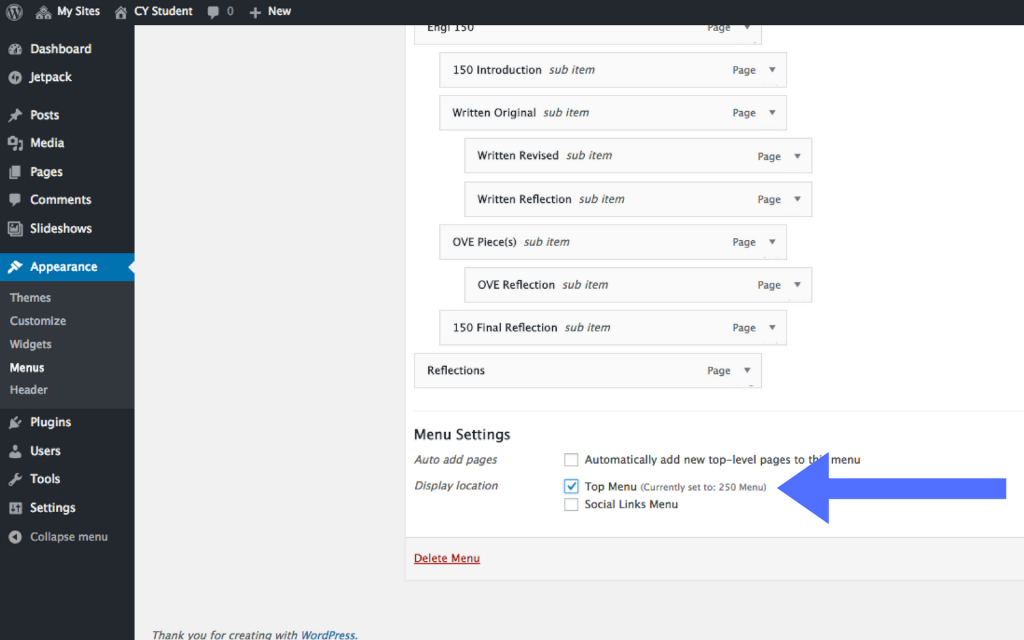
Once your pages are all added, you can drag your pages around in any order you like. If you click and hold one of the bars with your pages, you can drag it to the right a little bit until a box with dashed lines appears. Let go of that page and you now have a sub-item that will display as a dropdown tab on your menu. Move your pages into order (see picture below), check the box that says Top Menu (this will make your menu appear on your homepage), and finally click the Save Menu button.
For best results, reorder them to follow the structure pictured below.
Make sure to select the Top Menu box and Save Menu.
Navigate to your site and view the menu. You did it! Now you have all of your 150 and 250 materials organized into your ePortfolio.

For Support
If you encounter difficulty during any part of these tasks, please e-mail us at olt@iastate.edu for assistance, or stop by 306 Ross during our scheduled support hours.
If you cannot see the images in this documentation, click here.